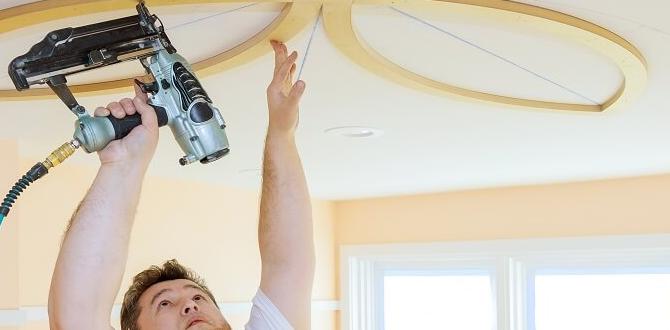
When it comes to finishing touches, installing shoe molding is a game-changer. The best brad nailer for this job makes it easy. Forget struggling with nails and a hammer. A good brad nailer drives fasteners precisely and quickly, giving you a professional look without the headache. Let’s find the perfect tool for your next project!
Hey there, fellow DIYers and woodworking enthusiasts! Jack Shaffer here from Nailerguy. You know, there’s a certain satisfaction that comes from a job well done, especially when you’re adding those elegant finishing touches to a room. Installing shoe molding is one of those steps that really elevates a space. But let’s be honest, trying to perfectly sink nails into delicate molding with a hammer can be frustrating, right? You worry about denting the wood, splitting it, or just not getting that nail head flush. It’s a common speed bump for many DIYers. Well, I’ve got great news! With the right tool, this job becomes incredibly simple and, dare I say, enjoyable. Today, we’re diving deep into how to choose and use the best brad nailer specifically for installing shoe molding. We’ll cover everything from what makes a brad nailer suitable for this task to essential features to look for, and I’ll even walk you through the installation process step-by-step. Get ready to banish those nailing worries and achieve flawless results!
Table of Contents
Why a Brad Nailer is Your Go-To for Shoe Molding
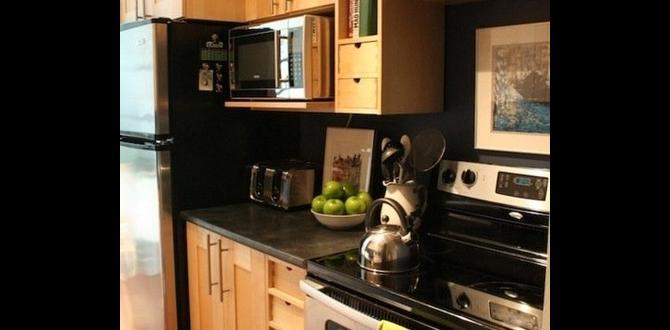
Shoe molding is typically a small, relatively thin piece of trim that covers the gap between your baseboard and the floor. Because it’s so slender, you need a tool that can fasten it securely without causing damage. This is where a brad nailer shines!
- Precision: Brad nailers use thin, small-gauge nails (typically 18-gauge), which are perfect for delicate trim like shoe molding. They leave a much smaller hole than a finish nailer, making them less likely to split the wood or leave a noticeable blemish.
- Speed: If you’ve ever tried to manually nail an entire room of molding, you know how time-consuming it can be. A brad nailer drastically speeds up the process, allowing you to complete your project much faster.
- Clean Finish: The small nail head from a brad nailer is easily countersunk or set slightly below the surface, making it simple to fill with wood filler for a seamless look.
- Reduced Damage: Unlike a hammer, which can easily slip and mar the surface of your molding or wall, a brad nailer provides a controlled, consistent way to drive fasteners.
Choosing the Best Brad Nailer for Installing Shoe Molding
Not all brad nailers are created equal, and when it comes to shoe molding, a few key features will make your life much easier. Let’s break down what to look for.
Key Features to Consider
When you’re shopping for a brad nailer for shoe molding, keep these points in mind:
- Gauge Size: As mentioned, 18-gauge is the standard for shoe molding. Look for a nailer that shoots 18-gauge brads. Some newer models might offer 16-gauge capability for slightly thicker molding, but 18-gauge is usually best to avoid splitting delicate wood.
- Nail Depth Adjustment: This is CRUCIAL. The ability to adjust how deep the nail is driven allows you to set the nail head perfectly flush with the surface of the molding, or slightly recessed for filling, without overdriving and damaging the wood.
- Lightweight and Compact Design: You’ll be holding this tool for extended periods, often at awkward angles. A lighter, more ergonomic brad nailer will reduce fatigue and improve maneuverability.
- Jam Release Mechanism: Jams are inevitable, but a good brad nailer makes clearing them quick and easy with a tool-free jam release.
- Dry Fire Lockout: This feature prevents the nailer from firing when it’s out of nails, protecting both the tool and your workpiece from unnecessary marks.
- Power Source: Brad nailers come in corded electric, battery-powered (cordless), and pneumatic (air-powered) varieties.
Power Source: Which is Right for You?
This is often the biggest decision when buying a brad nailer. Each type has its own pros and cons:
1. Pneumatic Brad Nailers
These are powered by compressed air from an air compressor. They are often the most powerful and lightest option in terms of the tool itself. However, you’ll need an air compressor, air hose, and potentially an air filter/regulator. Setup can be a bit more involved.
- Pros: Lightweight tool, powerful, typically lower cost for the nailer the compressor is an extra purchase, reliable.
- Cons: Requires air compressor and hose, tethered by the hose, compressor can be noisy.
2. Corded Electric Brad Nailers
These plug directly into a wall outlet. They offer consistent power without the need for batteries or compressors. The main drawback is being tethered by a power cord, which can be a nuisance when working around a room.
- Pros: Consistent power, no batteries to charge, typically less expensive than cordless.
- Cons: Limited by cord length, cord can get in the way.
3. Battery-Powered (Cordless) Brad Nailers
These are incredibly convenient. They run on rechargeable batteries, offering complete freedom of movement. Modern cordless brad nailers have great power and performance, often rivaling pneumatic models. The primary downside is the cost of the tool and batteries, and you need to ensure batteries are charged.
- Pros: Ultimate portability, no cords or hoses, quick setup.
- Cons: Can be heavier and more expensive, battery life needs management.
For shoe molding, given its often lengthy installation around a room, a cordless battery-powered brad nailer offers the best balance of convenience and performance for most DIYers. If you already own an air compressor, a pneumatic option is also an excellent choice.
Table: Top Brad Nailers for Shoe Molding (Examples)
While specific models change, here are some highly-regarded brands and types that consistently perform well for shoe molding. Always check the latest reviews for current recommendations.
| Brand/Model Type | Power Source | Gauge | Key Features for Molding | Why it’s Great for Shoe Molding |
|---|---|---|---|---|
| DEWALT 18-Volt Xtreme (XR) Cordless 18-Gauge Brad Nailer | Battery-Powered | 18-Gauge | Tool-free jam release, depth adjustment, dry-fire lockout | Excellent cordless freedom, consistent power, and great control for delicate trim. |
| Metabo HPT (Hitachi successor) 18-Gauge Cordless Brushless Brad Nailer | Battery-Powered | 18-Gauge | Brushless motor for efficiency, zero ramp-up time, adjustable depth control | Powerful, fast, and very reliable. Reduced maintenance with brushless motor. |
| BOSTITCH 18-Gauge Smart Point Cordless Brad Nailer | Battery-Powered | 18-Gauge | Pencil-point applicator tip (less surface marring), tool-free jam release, depth setting | The “Smart Point” tip is specifically designed for minimal surface damage, ideal for shoe molding. |
| SENCO Fusion TIGHT-WEDGE 18-Gauge Cordless Brad Nailer | Battery-Powered (uses internal compressor) | 18-Gauge | No external air source needed, instant firing, depth adjustment | A unique cordless design that offers pneumatic-like performance without an air compressor. Very user-friendly. |
| PORTER-CABLE 20V MAX Cordless 18-Gauge Brad Nailer | Battery-Powered | 18-Gauge | Engineered power source, tool-free jam release, depth adjustment | A more budget-friendly, reliable cordless option that still performs very well for trim work. |
| Bostitch HP18BN 18-Gauge Pneumatic Brad Nailer | Pneumatic | 18-Gauge | Lightweight, adjustable depth control, rear exhaust. | A classic, workhorse pneumatic option if you already have a compressor. Durable and efficient. |
Materials and Tools You’ll Need
Before you start, gather everything you’ll need. Having all your supplies ready makes the job go much smoother.
- Your Chosen Brad Nailer: Fully charged battery or connected to air.
- 18-Gauge Brad Nails: Ensure you have the correct length. For shoe molding, 1-inch to 1-1/4 inch nails are common. It’s good to have a few different sizes on hand just in case.
- Hammer (Optional/For Adjustments): A rubber mallet or a regular hammer with a nail set can be useful for making minor adjustments or setting nails if they aren’t perfectly flush.
- Wood Filler or Putty: To fill nail holes for a seamless finish. Choose a color that matches your molding.
- Putty Knife or Spreader: For applying wood filler.
- Safety Glasses: Absolutely essential! Always protect your eyes.
- Hearing Protection: Especially important if using a pneumatic nailer and compressor.
- Measuring Tape: For accurate cuts.
- Miter Saw (Recommended): For precise angled cuts at corners. A simple handsaw and miter box can work but are more challenging for beginners. For resources on saw safety, check out the Occupational Safety and Health Administration’s guide to safe use of power saws.
- Pencil: For marking measurements.
- Utility Knife or Brad Nailer (for trimming)
- Caulk: To seal gaps between the molding and the wall/baseboard.
- Caulk Gun: For easy application.
Step-by-Step: Installing Shoe Molding with Your Brad Nailer
Now, let’s get down to business! Follow these steps for a professional result.
Step 1: Prepare the Area and Measure
Clear the floor area where you’ll be working. Open your windows and doors for ventilation, especially if you’ll be using caulk or paint later.
Measure the length of each wall where you’ll be installing shoe molding. It’s often best to measure along the floor. Remember that you’ll be cutting angles for the corners, so account for that slightly longer length at the wall.
Step 2: Cut Your Molding
This is where precision is key. For shoe molding, you’ll typically be dealing with inside and outside corners.
- Inside Corners: Both pieces of molding will have a 45-degree miter cut, with the angle facing away from the corner. Think of it like a ‘V’ shape where the point goes into the corner.
- Outside Corners: Both pieces will also have a 45-degree miter cut, but this time the angle faces towards the corner.
Tip: It’s best to cut your molding slightly long and then trim it down for a perfect fit. Always cut one piece at a time and test fit it!
For more on cutting different types of molding for corners, resources like This Old House offer excellent visual guides.
Step 3: Set Your Brad Nailer
Gather your safety glasses! Put them on now. Load the 18-gauge brad nails into your nailer according to the manufacturer’s instructions. Make sure the nail size is appropriate for your molding thickness. If using a pneumatic nailer, ensure your compressor is set to the correct PSI, typically around 90-110 PSI for brad nailers, but always check your tool’s manual.
Now, practice on a scrap piece of wood that matches your molding. Adjust the depth setting on your brad nailer. You want the nail head to go just slightly below the surface of the wood, so it’s easy to fill, but not so deep that it breaks through the wood or splinters it.
Step 4: Start Nailing
Begin with a piece of molding. Hold it firmly against the baseboard and wall. Place the tip of the brad nailer against the molding. Squeeze the trigger to drive a nail. Place your first nail near the end of the molding, about 1-2 inches from the corner.
Drive subsequent nails approximately every 12-16 inches along the length of the molding. Ensure each nail is driven straight and at the desireddepth. Don’t be afraid to reposition the nailer for each shot.
Important: If your brad nailer has a sequential trigger (most do), you’ll need to press the safety contact tip against the wood before squeezing the trigger for each nail. If it has a contact trip mode, you press the trigger first, then bump the safety tip against the wood. Always refer to your tool’s manual!
Step 5: Secure Corners and Transitions
When you reach a corner, make sure the mitered edges meet snugly. Drive a nail or two near the mitered edge on both sides of the corner to hold them tight. Since this is often the most visible part, consider driving nails slightly closer together here (perhaps every 6-8 inches) for a secure fit.
If you are joining two pieces of molding end-to-end on a long wall (less common with shoe molding but possible), ensure the joint is butted up tightly and secure with nails on either side.
Step 6: Finish Nailing and Check
Continue working your way around the room, nailing the molding in place. Once all pieces are installed, step back and inspect your work. Look for any nails that didn’t drive in quite right. You can use a nail set and hammer to gently tap them flush if needed, or if one is too proud, a nail remover tool can help you pull it out to re-nail.
Here’s a quick look at common nail placement:
| Location | Nail Spacing | Purpose |
|---|---|---|
| Along straight sections | 12-16 inches | Securely attach molding to wall studs or baseboard. |
| Near corners (inside/outside) | 6-8 inches | Ensure corners are held tightly and prevent gapping. |
| Near ends of molding pieces | 1-2 inches from the end | Prevent splitting and secure joints. |
Step 7: Fill Nail Holes and Caulk
Once you’re happy with the nailed molding, it’s time to hide those nail heads. Use a putty knife to apply wood filler or wood putty over each nail hole. Slightly overfill to create a small dome, as the filler will shrink as it dries. Let it dry completely according to the product instructions.
After the filler has dried, lightly sand over the filled areas to make them smooth and flush with the molding surface. A fine-grit sandpaper (around 180-220 grit) works well here.
Finally, apply a bead of paintable caulk along the top edge of the shoe molding where it meets the wall, and along the bottom edge where shoe molding meets baseboard if there’s a slight gap there. This creates a clean, finished look and seals out dust.
Troubleshooting Common Issues
Even with the best tools, you might run into a snag. Here are a few common problems and how to fix them.
- Nail Jam: Disconnect the power source (unplug electric, remove battery, or disconnect air). Use the tool-free jam release mechanism to open the nose and carefully remove the jammed nail.
- Nail Not Driving Deep Enough: Check your depth adjustment setting –