Beginner woodworking projects with hand tools are achievable, rewarding, and don’t require a huge investment to start. Focus on simple, essential items that build your skills using basic tools like handsaws, hammers, and screwdrivers. These projects are perfect for developing confidence and creating useful items for your home.
Ever looked at a beautifully crafted wooden shelf or a sturdy birdhouse and thought, “I could never do that”? Many folks feel that way, especially when they see all the fancy power tools in a workshop. But guess what? You can absolutely get started with woodworking using just the power of your own hands and a few fundamental tools. It’s all about starting smart with projects that are fun, build your skills, and don’t break the bank. We’re going to walk through how to pick the right projects and the essential hand tools you’ll need to bring them to life.
Think of this as your friendly guide to unlocking your inner craftsman. We’ll break down everything step-by-step, making sure you feel confident and capable. No more intimidation, just pure, rewarding DIY fun. Ready to pick up a hammer and make something awesome?
Table of Contents
Frequently Asked Questions
What are the most basic hand tools for woodworking?
The absolute must-haves for beginner woodworking with hand tools include a measuring tape, a handsaw (like a crosscut saw), a hammer, a screwdriver set, a sandpaper block, and a basic chisel. These are the workhorses that will help you measure, cut, fasten, and finish your projects.
Is woodworking with hand tools hard?
It can be a learning curve, but it’s not inherently hard! It requires patience, precision, and a willingness to practice. Hand tools offer a more intimate connection with the wood, allowing you to feel your progress. Many find it very satisfying once they get the hang of it.
What kind of wood is best for beginners?
Softwoods like pine and poplar are excellent choices for beginners. They are readily available, affordable, and easy to cut and work with using hand tools. They also take finishes well, so your projects will look great.
How do I ensure my projects are square and straight with hand tools?
Using a reliable combination square or a speed square is key to marking perfectly square lines before you cut. When making cuts, go slowly and try to keep your saw blade precisely on your marked line. For assemblies, use clamps and check for squareness with your square before fastening.
Where can I find simple woodworking plans?
Countless resources exist! Websites like Wood Magazine, YouTube channels dedicated to beginner woodworking, and even many woodworking blogs offer free or low-cost plans for simple projects. Look for plans specifically designed for hand tools.
How important is safety when using hand tools?
Safety is paramount, even with hand tools. Always wear safety glasses to protect your eyes from flying sawdust or wood chips. Keep your work area clean and organized. Be mindful of where your hands are in relation to the cutting edge of any tool, and never rush your work.
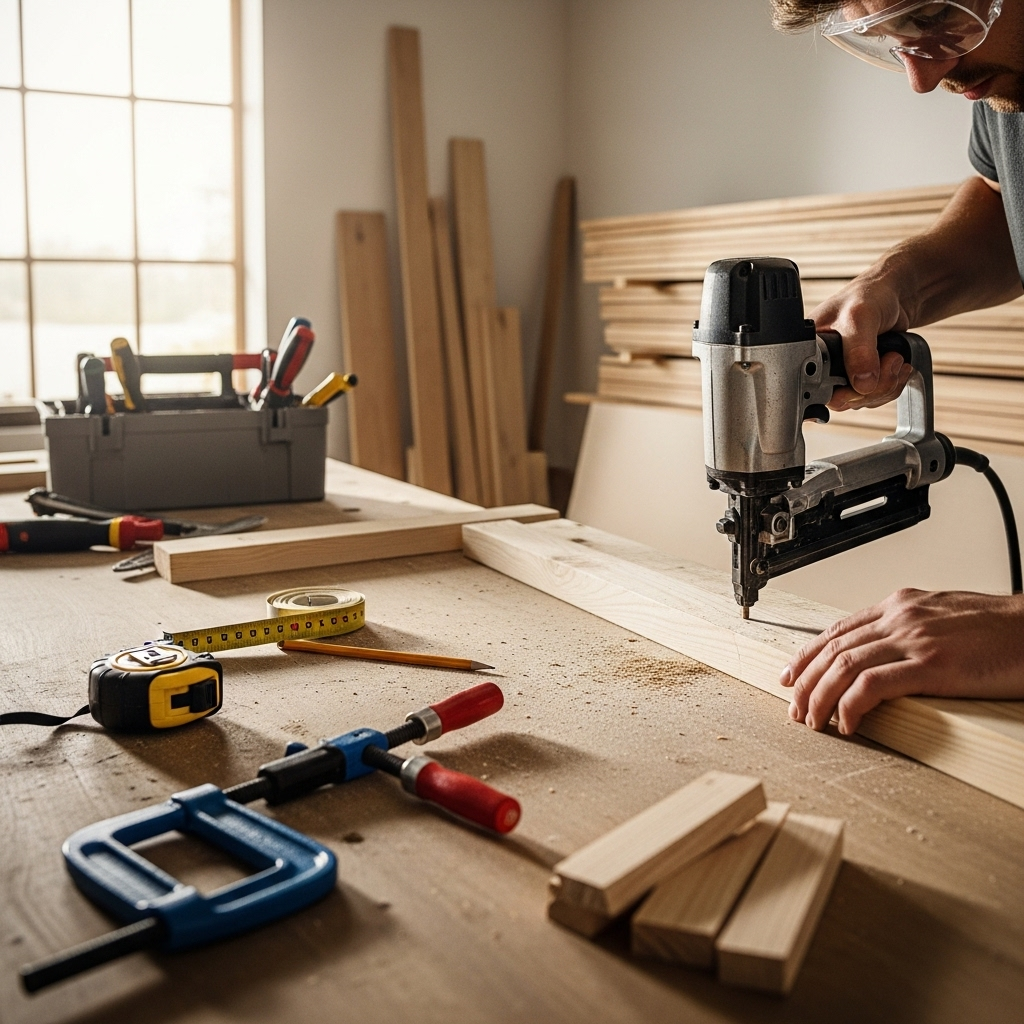
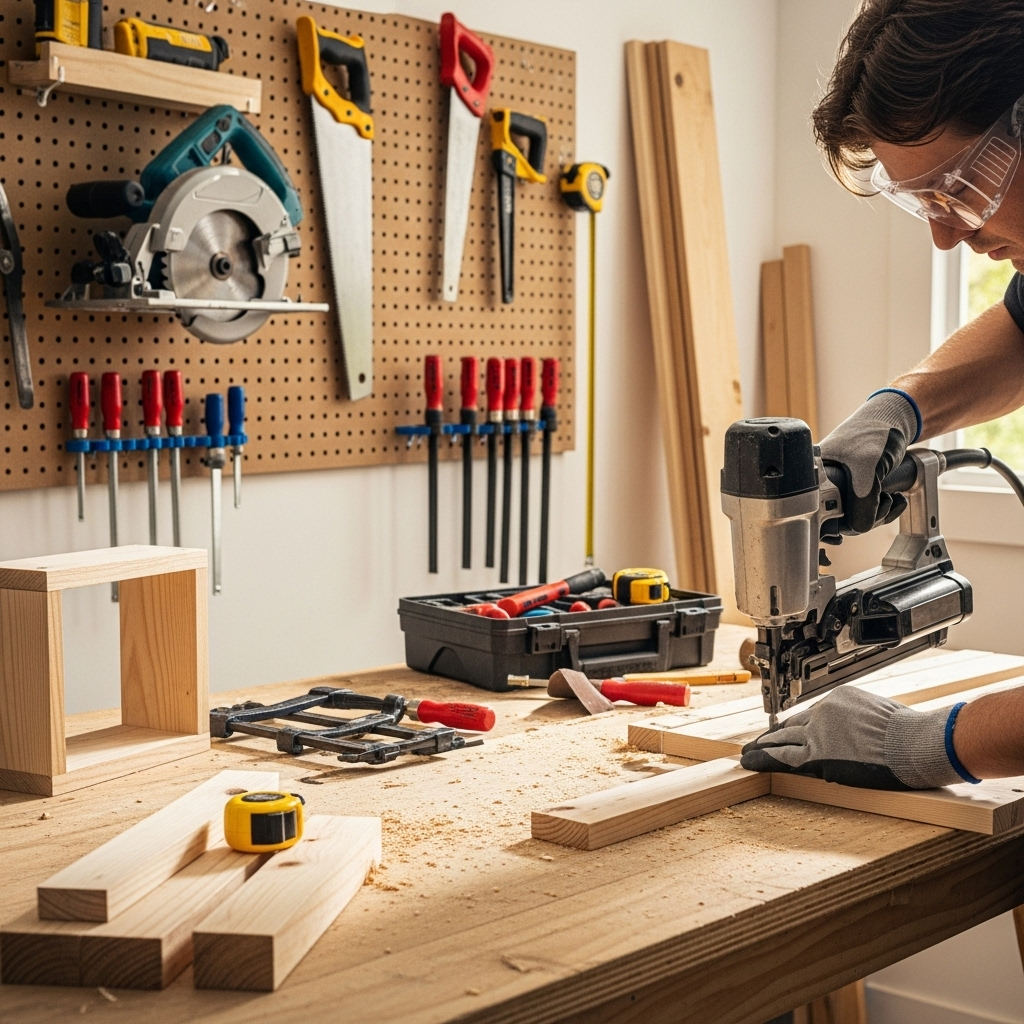
Essential Hand Tools for Your Beginner Woodworking Toolkit
Starting woodworking doesn’t mean you need a workshop filled with expensive power tools. The beauty of hand tool woodworking is its simplicity, portability, and the incredible satisfaction you get from working the wood with your own hands. For beginner projects, a core set of reliable hand tools is all you need to build foundational skills and create some fantastic items. Let’s go over the absolute essentials.
Measuring and Marking Tools
Accuracy starts here. Without precise measurements, your project likely won’t fit together as intended. These tools ensure you’re cutting the right lengths and marking the perfect lines.
- Measuring Tape: A good quality 16-foot or 25-foot retractable measuring tape is indispensable. Look for one with clear markings and a locking mechanism.
- Pencil: Regular #2 pencils work, but carpenter’s pencils are great for marking on wood as they have a broader lead that leaves a clear line and is less likely to roll away.
- Combination Square: This is a versatile tool that helps you mark 90-degree and 45-degree angles, scribe lines parallel to an edge, and check for squareness. It’s a true workhorse for any beginner.
- Marking Knife (Optional, but Recommended): For more precise cuts, a marking knife creates a thin channel that your saw can follow, leading to cleaner results.
Cutting Tools
These are the tools that do the heavy lifting, transforming raw lumber into precisely sized pieces.
- Handsaw: For most beginner projects, a crosscut handsaw is ideal. This saw is designed to cut across the grain of the wood. Look for one with a comfortable handle and about 8-10 teeth per inch (TPI) for general use. A smaller backsaw (like a tenon saw) is also very useful for finer cuts and joinery.
- Chisels: A basic set of chisels (e.g., 1/2 inch, 3/4 inch, 1 inch) will be invaluable for cleaning up housings, paring away small amounts of wood, and even some basic joinery. Ensure they come reasonably sharp or you’re prepared to learn how to sharpen them.
- Coping Saw or Jigsaw (for curved cuts): If your projects involve curves, a coping saw is a simple hand tool that can do the job. A manual jigsaw is also an option, though its effectiveness is limited compared to a power version.
Joining and Fastening Tools

Once your pieces are cut, you’ll need to join them securely. Hand tools make this process straightforward and strong.
- Hammer: A standard claw hammer (around 16 oz) is perfect for driving nails and removing them if you make a mistake.
- Screwdrivers: A set of both Phillips head and flat head screwdrivers in various common sizes is essential for any screws you might use.
- Wood Glue: While not a “tool” in the traditional sense, a good quality wood glue is the backbone of strong wooden joints.
- Clamps: You’ll need a few clamps to hold pieces together while the glue dries. Bar clamps, C-clamps, or spring clamps are all useful depending on the project.
Shaping and Finishing Tools
These tools help refine your project and give it a smooth, professional look.
- Sandpaper: A variety of grits (e.g., 80, 120, 220) is necessary for smoothing rough edges and surfaces.
- Sanding Block: Using a sanding block helps distribute pressure evenly, preventing you from creating dips or uneven surfaces. You can make a simple one from a block of wood or buy a foam sanding block.
- Block Plane (Optional, but very useful): A small block plane is fantastic for chamfering edges, slightly trimming down pieces, and taking the sharp edge off corners.
Safety Gear
This is NON-NEGOTIABLE. Protecting yourself is the most important step. Ensure you have:
- Safety Glasses: Always! Protect your eyes from sawdust, chips, and accidental pokes.
- Work Gloves (Optional, but recommended): Can protect your hands from splinters and minor abrasions.
Genius Beginner Woodworking Projects With Hand Tools
Now that you have a grasp of the essential tools, let’s dive into some beginner-friendly woodworking projects that are not only simple to build but also incredibly useful or decorative. These projects are designed to hone your skills with hand tools, build your confidence, and give you tangible results you can be proud of. We’ll focus on projects that utilize basic cuts, simple joinery, and straightforward assembly.
Project 1: Simple Wooden Planter Box
A planter box is a classic beginner project. It’s practical for gardening enthusiasts, looks great on a porch or patio, and involves basic cutting and assembly. You can make it any size you like, but starting with something around 18-24 inches long is manageable.
What You’ll Build
A sturdy, rectangular box with four sides and an optional bottom, perfect for holding plants.
Skill Focus
Measuring, straight cuts with a handsaw, applying wood glue, and using screws or nails for assembly. You’ll also practice checking for squareness.
Materials You’ll Need
- Common pine boards (e.g., 1×6 nominal size, which is actually about 3/4 inch thick by 5 1/2 inches wide). You’ll need about 6-8 feet.
- Wood screws (1 1/4 inch or 1 1/2 inch outdoor-rated screws are good) OR finishing nails.
- Wood glue (exterior grade if it will be outside).
- Sandpaper (medium and fine grit).
- Optional: A piece of thin plywood or extra wood for the bottom.
Step-by-Step Guide
- Measure and Mark: Decide on your dimensions. For an 18-inch long planter, cut two side pieces at 18 inches and two end pieces at, say, 5 1/2 inches (if using 1×6, this makes for a square end).
- Cut Your Pieces: Using your handsaw and a square to guide your cut, carefully cut all four side pieces. Take your time and aim for straight, clean cuts.
- Assemble the Sides: Apply wood glue to the ends of the shorter end pieces. Position them between the longer side pieces to form a rectangle. Use clamps to hold them in place.
- Fasten the Sides: Pre-drill pilot holes if using screws to prevent splitting the wood. Drive screws through the longer sides into the ends of the shorter sides, or carefully hammer finishing nails. Ensure the corners are square using your combination square.
- Add the Bottom (Optional): If you want a solid bottom, measure the inside dimensions of your assembled box and cut a piece of plywood or wood to fit. Glue and screw or nail it in place. For drainage, you can either omit the bottom entirely or drill a few holes in it.
- Sand and Finish: Once the glue is dry, sand all surfaces and edges, starting with a medium grit and finishing with a fine grit. Apply an exterior-grade stain, paint, or sealant to protect the wood from the elements if it will be outdoors.
Project 2: Classic Wooden Shelf

A simple shelf unit is a perfect way to add storage and style to any room. This project is excellent for practicing precise cuts and creating surprisingly strong joints with just glue and nails/screws.
What You’ll Build
A basic floating shelf or a shelf with visible brackets. We’ll focus on a simple shelf unit with two sides and a few shelves.
Skill Focus
Accurate measuring and cutting, consistent joinery, assembly using glue and fasteners, and ensuring the unit is level and plumb.
Materials You’ll Need
- Common pine boards (e.g., 1×8 nominal size for shelves and sides). You’ll need about 8-10 feet.
- Wood glue.
- Wood screws (1 1/2 inch) OR finishing nails.
- Sandpaper (medium and fine grit).
- Optional: Wood dowels for a slightly stronger joint.
- Optional: L-brackets or shelf supports if not building a free-standing unit.
Step-by-Step Guide
- Plan Your Shelf: Decide on the height, width, and depth. For a small unit, let’s say two sides that are 24 inches tall and three shelves that are 18 inches wide.
- Cut the Sides: Cut two identical pieces from your 1×8 board to be your vertical sides (24 inches long).
- Cut the Shelves: Cut three identical pieces from your 1×8 board to be your horizontal shelves (18 inches long).
- Mark Shelf Locations: On the inside face of each side piece, carefully measure and mark the positions for your shelves. Use your combination square to draw lines straight across these marks. Ensure the marks are at the same height on both side pieces.
- Assemble the First Side: Lay one side piece flat. Apply glue to one end of a shelf and align it perfectly with the marked line. Clamp it in place. Pre-drill pilot holes and drive screws through the side into the shelf end, or use finishing nails. Repeat for all three shelves.
- Attach the Second Side: Once the first side is assembled, apply glue to the other ends of the shelves. Carefully position the second side piece, aligning it with the shelf ends and your marks. Clamp securely. Pre-drill and fasten.
- Check and Reinforce: Use your square to ensure everything is at 90 degrees before the glue sets. If you’re using dowels, you’d drill holes in the shelf ends and side pieces beforehand and glue them in during assembly.
- Sand and Finish: Once fully dry, sand all surfaces, paying attention to edges and any rough spots. Apply your desired finish. You can then mount it using pre-drilled holes in the sides or by attaching brackets to the wall and the shelf.
Project 3: Simple Wooden Toolbox or Caddy
A toolbox or a caddy is a fantastic project that’s not only practical for storing your new hand tools but also teaches you how to build with angled cuts and manage joining dissimilar pieces.
What You’ll Build
A rectangular box with sturdy sides, a reinforced bottom, and a simple handle.
Skill Focus
Cutting angles (optional, but adds to the design), strong joinery, creating a sturdy handle, and basic assembly.
Materials You’ll Need
- 1×6 and 1×4 nominal lumber (pine, poplar). You’ll need about 6-8 feet of each.
- Wood glue (exterior grade if it will be outside).
- Wood screws (1 1/4 inch and 1 inch) OR finishing nails.
- Sandpaper (medium and fine grit).
- A piece of dowel rod (about 3/4 inch thick) for the handle of a caddy.
Step-by-Step Guide
- Cut Side Pieces: For a 12-inch long toolbox/caddy, cut two pieces of 1×6 lumber to 12 inches. Let these be your base sides. For the front and back, you can cut two pieces of 1×6 to about 5 inches tall. For a more decorative look, you can cut an angle on the top of these front/back pieces. Use your saw to cut a gentle slope from the center down to the sides.
- Cut Support Pieces (for the bottom): Cut four pieces of 1×4 lumber. Two will be the length of your sides (12 inches), and two will be the width of your front/back pieces (minus the thickness of the two side boards if they overlap). These will support the bottom.
- Assemble the Box Frame: Glue and screw/nail the shorter front and back pieces to the ends of the longer base sides. Ensure the lower edges are flush.
- Add Bottom Supports: Glue and screw/nail the 1×4 support pieces to the inside of the box frame along the bottom edge. These will create a recessed area for your toolbox bottom.
- Cut and Install the Bottom: Measure the inside dimensions of the recessed area made by the support pieces. Cut a piece of 1×6 or plywood to fit snugly. Glue and screw/nail it in place through the support pieces.
- Create a Handle (for a caddy): Cut two small vertical pieces (about 2-3 inches tall) from 1×6 for the ends of your caddy. Drill an appropriately sized hole in the top center of each. Cut a section of dowel rod to span the width of your caddy, plus a little extra on each side to hold. Glue the dowel into the holes of the end pieces. Then, glue and screw/nail these end pieces to the sides of your caddy.
- Sand and Finish: Sand all surfaces thoroughly, starting with medium grit and moving to fine. Round over any sharp edges slightly. Apply a durable finish.
Beginner Project Comparison
| Project Type | Primary Skills Developed | Ease of Assembly | Material Cost (Estimate) | Usefulness |
|---|---|---|---|---|
| Wooden Planter Box | Straight cuts, glue-up, basic fastening. | Very Easy | $15 – $30 | Gardening, home decor. |
| Classic Wooden Shelf | Precise measuring, consistent joinery, level assembly. | Easy | $20 – $40 | Storage, display, organization. |
| Wooden Toolbox/Caddy | Basic joinery, potentially angled cuts, handle creation, robust assembly. | Medium | $25 – $45 | Tool storage, carrying items. |
This table provides a quick overview to help you choose the project that best suits your current skill level and immediate needs. Each project is designed to build confidence and competence with hand tools.
Tips for Success with Hand Tools
Working with hand tools is a deeply rewarding experience. It’s about patience, precision, and a connection with the material. To make your journey as smooth and enjoyable as possible, here are some essential tips that will set you up for success.
Keep Your Tools Sharp
This is perhaps the single most important tip. Sharpened tools cut effortlessly, cleanly, and safely. A dull tool requires more force, increases the risk of slipping, and produces ragged cuts. Invest in a sharpening stone (or a sharpening system) and learn the basics of sharpening your saw, chisels, and plane. Organizations like the Popular Mechanics provide excellent guides on this fundamental skill.
Measure Twice, Cut Once
This old adage holds true for a reason. Before you make any cut, double-check your measurements. Use your combination square to mark your cut line precisely. A tiny error in measurement can lead to pieces that don’t fit, so take your time here.
Understand Wood Grain
Wood grain refers to the direction of the fibers in the wood. When you cut “with the grain” (lengthwise), it’s much easier and cleaner. Cutting “across the grain” requires more effort. Pay attention to the direction of the grain, especially when planing or using chisels, to avoid tear-out (where wood splinters and lifts unevenly).
Practice Your Cuts
Don’t expect perfect results on your very first try. Grab some scrap wood and practice making straight rips (cutting along the grain) and crosscuts (cutting across the grain) with your handsaw. Practice using your chisel to pare away small amounts of wood.
Use Clamps Effectively
Clamps are your best friend when gluing. They hold pieces firmly in place while the glue dries, ensuring tight, strong joints. Make sure your clamps are the right size for your project and that you apply enough, but not excessive, clamping pressure.
Keep Your Workspace Clean
A tidy workspace isn’t just about aesthetics; it’s crucial for safety and efficiency. Remove sawdust and wood scraps regularly. This prevents you from tripping, keeps your tools from getting buried, and makes it easier to find what you need.
Start Simple and Build Up
Don’t try to tackle a complex piece of furniture on your first attempt. The projects listed above are excellent starting points. As you gain confidence and skill with each successful build, you can gradually move on to more intricate designs and techniques.
Don’t Be Afraid to Make Mistakes
Everyone makes mistakes, especially when learning. The key is to learn from them. A misplaced screw can often be filled, a slightly off cut can sometimes be salvaged, and even a “ruined” piece can often be repurposed. View mistakes as learning opportunities.
Conclusion: Your Woodworking Journey Begins
Embarking on a woodworking journey with hand tools is an incredibly accessible and rewarding path. You’ve seen that with just a few essential hand tools and a bit of patience, you can create beautiful, functional items for your home. The projects we’ve explored – the planter box, the simple shelf, and the toolbox/caddy – are designed to build your core skills step by step.
Remember, the most important tool you have is your willingness to learn and to practice. Keep your tools sharp, measure carefully, and don’t shy away from the learning process. Each cut, each joint, and each sanded surface brings you closer to mastering this craft. The satisfaction of building something with your own two hands, using tools that have been fundamental to craftsmanship for centuries, is truly unparalleled.
So, gather your tools, pick a project, and get started. Your workshop might be your kitchen table or a small corner of your garage, but your potential is limitless. Happy woodworking!