Quick Summary:
Looking for the best battery-powered finish nailer? This guide breaks down top models, essential features like power, battery life, and ergonomics, and offers straightforward reviews to help you nail your next project with confidence. We’ll cover what beginners need to know to make a smart choice.
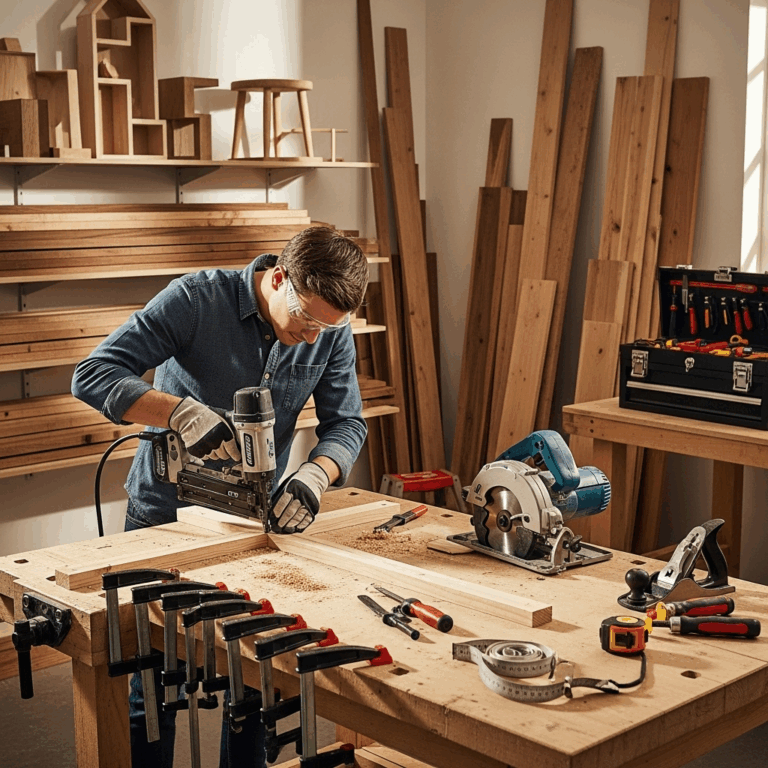
Hey there, DIYers and woodworking friends! Jack Shaffer here, your guide from Nailerguy. So, you’re eyeing up a battery-powered finish nailer, huh? It’s a fantastic tool that can make trim work, molding installation, and all sorts of detailed jobs feel way easier. But wading through all the options can feel a bit overwhelming, right? Don’t worry! I’m here to simplify things. This guide will walk you through exactly what to look for, what makes a good finish nailer stand out, and what the popular models are really like. We’ll get you prepped to pick the perfect nailer for your toolbox.
Table of Contents
Why Choose a Battery-Powered Finish Nailer?
Let’s talk about why these cordless wonders are becoming a go-to for so many of us. Traditional nailers often need an air compressor and a hose. While they’re powerful, that setup can be clunky and limit where you can work. Battery-powered finish nailers ditch the compressor, giving you total freedom to move around your project, whether it’s on a ladder, in a tight corner, or far from a power outlet.
They’re also incredibly convenient. No more wrestling with hoses or worrying about finding an air source. Just grab your nailer, a charged battery, and you’re ready to go. This makes them perfect for quick fixes, smaller projects, and anyone who values efficiency and a clutter-free workspace. Plus, modern battery tech means these tools pack a serious punch, driving nails effectively into various wood types.
Key Features to Consider in Battery-Powered Finish Nailers
When you’re looking at battery-powered finish nailers, a few core features will make or break your experience. Let’s break them down so you know exactly what to keep an eye on.
Nail Size Compatibility
Finish nailers typically drive nails ranging from 1-1/4 inches up to 2-1/2 inches. It’s good to know what size nails your project will require. Common sizes are 1-1/2 inch, 1-3/4 inch, and 2 inch. Make sure the nailer you choose can handle the nail lengths you’ll be using most often. Most finish nailers are designed for 16-gauge or 15-gauge nails, with 16-gauge being very common for trim work because the holes they leave are less visible.
Power and Driving Depth
You want a nailer that has enough power to sink nails flush with the surface, even in hardwoods. Forcing nails halfway in is frustrating and requires extra work to fix. Look for nailers that offer adjustable depth control. This lets you fine-tune how deep the nail goes, preventing over-driving (which can damage your wood) or under-driving. A good depth adjustment system is usually a dial or a lever near the nose of the tool.
Battery Life and Compatibility
This is crucial for cordless tools. How many nails can you drive on a single charge? Most manufacturers will give you an estimate, often in the hundreds or even thousands of nails. Consider your typical project size. If you’re doing a whole house of trim, you’ll need a battery that can keep up. Also, check if the battery system is part of a larger tool family. If you already own other tools from a brand that use the same battery, you can save money and reduce clutter by sticking with that brand.
Ergonomics and Weight
You’ll be holding this tool for extended periods, so comfort is key. How does it feel in your hand? Is it well-balanced? A lighter tool is generally easier to handle, especially when working overhead or in awkward positions. Check the grip – a comfortable, non-slip grip can prevent fatigue and improve control. Try to hold the tool in a store if possible, or read reviews that specifically mention comfort and balance.
Jam Clearance
Nail jams happen. It’s just part of using nail guns. What’s important is how easy it is to clear a jam. Some nailers have tool-free jam release mechanisms, which are a lifesaver. This means you can typically open a small panel on the nose without needing extra tools to free a jammed nail. This can save you a lot of time and frustration on the job.
Trigger Lock-Out and Safety Features
Safety is paramount. Look for features like a trigger lock-out to prevent accidental firing and a safety contact tip that must be pressed against the work surface before the nail will fire. Many nailers also have a mode selector, allowing you to switch between sequential firing (one nail at a time for precision) and contact firing (rapid firing by bumping the nose). Understanding these safety features and how to use them is vital.
Top Battery-Powered Finish Nailer Reviews
Alright, let’s get down to some specific models that have impressed me and many others in the DIY and professional communities. Keep in mind that the “best” nailer often depends on your specific needs and budget, but these are consistently strong performers.
1. DeWalt 20V MAX XR Brushless Cordless 2-Tool Combo Kit (DWFP71843) – often includes a Brad Nailer & Finish Nailer
DeWalt is a name many trust for good reason, and their 20V MAX XR line is a solid choice. This kit often bundles a finish nailer (usually 15-gauge) with a brad nailer, making it versatile for various trim tasks.
- Pros: Excellent battery life, robust build quality, powerful enough for most hardwoods, brushless motor for efficiency and longevity, part of a huge tool system. Jam clearing is usually straightforward.
- Cons: Can be a bit heavier than some competitors, the initial kit price might be higher.
- Best For: Serious DIYers and pros who need reliability and are already invested in the DeWalt 20V system.
2. Metabo HPT (formerly Hitachi) 18V Brushless Cordless 2-1/2″ Finish Nailer (NT1865DM)
Metabo HPT has been quietly making some of the best cordless nailers for years. Their 18V finish nailer (16-gauge) is known for its impressive power and the ability to drive nails flush consistently.
- Pros: Very powerful, drives nails reliably into oak and other hard woods, lightweight and well-balanced, excellent battery life (often 800+ nails per charge), great ergonomics.
- Cons: Battery and charger might be sold separately for bare tool price.
- Best For: Anyone needing a powerful and reliable nailer for tough jobs, especially anyone who appreciates a tool that feels good in the hand.
3. Ryobi ONE+ 18V Cordless 16-Gauge Cordless Finish Nailer (P325)
If you’re on a tighter budget or just starting out, Ryobi’s ONE+ system is a fantastic entry point. Their 16-gauge cordless finish nailer is very popular for its affordability and ease of use.
- Pros: Very affordable, lightweight, easy to use depth adjustment, good for pine and softer woods. If you have Ryobi ONE+ batteries, it’s a no-brainer.
- Cons: May struggle with very hard woods, battery life might not be as extensive as premium brands.
- Best For: Budget-conscious DIYers, homeowners, and hobbyists working on smaller projects or with softer woods.
4. Milwaukee M18 FUEL 18-Volt Lithium-Ion Brushless Cordless 16-Gauge Straight Finish Nailer (2741-20)
Milwaukee’s M18 FUEL line is all about high performance, and their 16-gauge finish nailer is no exception. It’s engineered for speed and power, aiming to deliver a pneumatic feel.
- Pros: Powerful, fast firing rate, excellent depth control, LED light to illuminate the work area, low-profile tip for accurate placement.
- Cons: Higher price point, can be a bit heavier.
- Best For: Users who demand top-tier performance and speed, especially if they are already in the Milwaukee M18 ecosystem.
5. Paslode Cordless 16-Gauge Straight Finish Nailer (902400)
Paslode is a bit different. Many of their cordless nailers use a fuel cell and battery system, which is a unique approach. This can offer immense power but requires consumables.
- Pros: Extremely powerful, can drive nails into the hardest materials, compact and lightweight.
- Cons: Requires proprietary fuel cells (an ongoing cost), can be more complex to maintain than all-electric models.
- Best For: Users who prioritize raw driving power above all else and don’t mind the fuel cell system.
How Battery-Powered Finish Nailers Work
Understanding the basic mechanics can boost your confidence. Most modern battery-powered finish nailers use an electric motor and a small compressed air system housed within the tool itself. When you pull the trigger and press the nose to your material:
- The motor spins a fan or flywheel.
- This rapidly compresses a small amount of air into an internal chamber.
- When the chamber reaches sufficient pressure, it forcefully drives a piston, which in turn pushes the nail out of the magazine.
This all happens in a fraction of a second, giving you that satisfying “thwack!” sound. It’s a self-contained system that eliminates the need for an external air compressor. For a great overview of how nail guns work safely, you can check out resources from organizations like the Occupational Safety and Health Administration (OSHA) on the safe use of powder-actuated tools and pneumatic nailers, which have applicable safety principles.
Using Your Battery-Powered Finish Nailer Safely
Safety is the most important aspect when using any power tool, especially something that drives nails at high speed. Follow these guidelines to stay safe:
- Read the Manual: Always start by reading the manufacturer’s instructions for your specific nailer.
- Wear Safety Glasses: This is non-negotiable. Always wear safety glasses or goggles to protect your eyes from flying debris or ricocheting nails. A full face shield can offer even more protection.
- Keep Fingers Away: Never place your fingers near the nose of the nailer or the firing mechanism.
- Engage Safety Features: Ensure the trigger lock-out is engaged when not in use and that you understand how to use the contact-fire safety mechanism.
- Never Point at Yourself or Others: Treat the nailer like a loaded firearm. Never point it at yourself or anyone else, even if you think it’s empty or disengaged.
- Work Environment: Ensure your work area is clean and free of tripping hazards. Be aware of where nails might exit or ricochet.
- Correct Nail Type: Only use the specified type and size of nails for your nailer. Using incorrect nails can cause jams or damage the tool.
- Battery Management: Keep batteries charged and store them properly. Never attempt to modify them.
Pros and Cons of Battery-Powered Finish Nailers
Like any tool, these cordless wonders have their upsides and downsides. Here’s a quick rundown:
| Pros | Cons |
|---|---|
| Unrivaled portability and freedom of movement. | Initial cost can be higher than pneumatic tools (nailer, batteries, charger). |
| No need for an air compressor, hoses, or air line. | Can be heavier than pneumatic counterparts due to battery and motor. |
| Quick setup and easy to use for small jobs or quick fixes. | Battery life, while improving, is a finite resource and requires charging. |
| Modern models offer good power and consistent performance. | Ongoing cost if battery life becomes an issue or if using fuel cell models. |
| Reduced noise compared to some gas-powered tools. | May struggle with extremely dense hardwoods compared to high-PSI pneumatic options. |
| Less maintenance than pneumatic systems (no air filters, water traps). | Limited by battery charge; can be an issue for very large, continuous jobs without spare batteries. |
Getting Started: Your First Project
So, you’ve picked out your nailer. Now what? Let’s say your first project is installing some crown molding or baseboards. It’s a great way to get acquainted with your new tool.
Step-by-Step: Installing Trim with Your New Nailer
- Gather Materials and Tools: Your battery-powered finish nailer, the correct size finish nails (e.g., 16-gauge, 2-inch for baseboards), safety glasses, tape measure, pencil, miter saw, caulk, and wood filler.
- Measure and Cut Your Trim: Carefully measure your walls and use your miter saw to cut the trim pieces to the correct angles (usually 45 degrees for corners).
- Dry Fit: Before nailing, hold the trim piece in place to ensure a good fit.
- Load Your Nailer: Open the magazine on your finish nailer and load the appropriate nails. Make sure they are seated correctly. Refer to your manual if unsure.
- Set Depth and Mode: Adjust the depth setting on your nailer so that the nails will be sunk just below the surface of the wood, ready for filling. Set your firing mode (usually sequential for precise placement).
- Nail in Place: Hold the trim firmly against the wall. Press the safety contact tip against the wood and squeeze the trigger. Aim to place nails about 6-8 inches apart along the length of the trim, and into studs where possible for a secure hold.
- Repeat for All Pieces: Work your way around the room, carefully cutting, fitting, and nailing each piece of trim.
- Finish Work: Once all trim is installed, use wood filler or caulk to fill nail holes and any small gaps. Sand smooth and paint or stain as desired.
Remember, practice makes perfect! Starting with trim is a fantastic way to build your confidence and skill with a finish nailer.
Frequently Asked Questions (FAQ)
Q1: What’s the difference between a finish nailer and a brad nailer?
A finish nailer drives thicker, stronger nails (typically 15- or 16-gauge) and is ideal for baseboards, crown molding, and heavier trim where holding power is important. A brad nailer uses thinner, smaller nails (typically 18-gauge) that leave very small, almost invisible holes, making them perfect for delicate trim, shoe molding, and crafts.
Q2: How many nails can I expect to get from a single battery charge?
This varies significantly by brand and battery size. Most modern battery-powered finish nailers can drive anywhere from 500 to well over 2,000 nails on a full charge. Check the manufacturer’s specifications – they often provide estimates.
Q3: Can a battery-powered finish nailer handle hardwoods?
Yes, most good quality battery-powered finish nailers have enough power to drive nails into common hardwoods like oak. For extremely dense hardwoods, you might need a more powerful model or consider pre-drilling pilot holes to prevent splitting or stalling.
Q4: How do I adjust the depth on my finish nailer?
Most finish nailers have a small dial or lever, usually located near the nose of the tool. Turn it one way to drive nails deeper and the other way to set them less deep. It’s trial and error on a scrap piece of wood to find the perfect setting for your material.
Q5: What maintenance do battery-powered finish nailers require?
Generally, they require less maintenance than pneumatic nailers. Keep the nose clean, especially around the firing mechanism, and lubricate it periodically according to the manufacturer’s instructions (usually a drop of oil every so often). Always store it properly.
Q6: Is it worth it to buy a nailer kit with batteries and a charger?
If you’re new to a particular tool brand’s battery system, buying a kit is usually more cost-effective than purchasing the tool, battery, and charger separately. If you already own batteries for that system, buying a “bare tool” (tool only) is the smarter economic choice.
Conclusion: Nail Your Next Project with Confidence
Choosing the right battery-powered finish nailer is an investment in your projects and your efficiency. By understanding the key features – like nail size compatibility, driving depth, battery performance, and ergonomics – you can make an informed decision. Whether you’re tackling a detailed trim job, crafting furniture, or simply need a reliable tool for home repairs, a good cordless finish