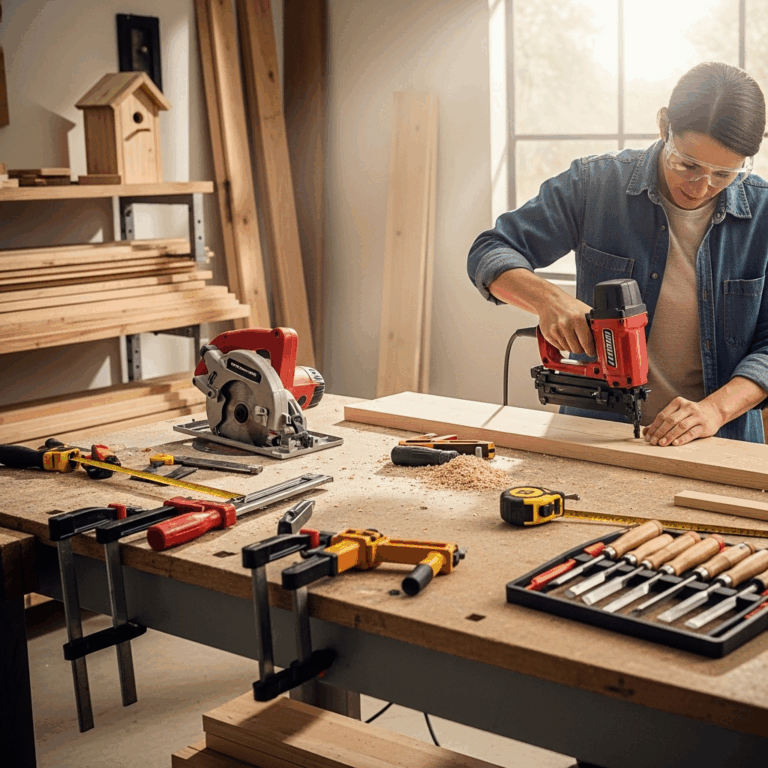
A battery-powered brad nailer is an essential tool for DIYers and woodworkers, making furniture assembly, trim work, and small projects incredibly fast and easy. Cordless freedom means no compressors or hoses, allowing for quick setups and seamless project completion, especially for beginners.
Have you ever battled with a project that required lots of small nails, only to find yourself fumbling with a hammer, dropping nails, and ending up with sore fingers and uneven results? It’s a common frustration for DIYers and woodworkers alike. Tackling detailed assembly, delicate trim, or even building a birdhouse can feel more like a chore than a joy when you’re wrestling with traditional fastening methods. But what if there was a way to make it faster, neater, and much more enjoyable? Well, there is! In this guide, we’ll walk you through how a battery-powered brad nailer can become your new best friend for effortless assembly. Get ready to transform your projects from daunting tasks into satisfying accomplishments.
Table of Contents
Why a Battery-Powered Brad Nailer is Your New Go-To Tool
Let’s be honest, while a hammer is a classic for a reason, it’s not always the best tool for the job, especially for intricate work. This is where the battery-powered brad nailer shines. It’s designed for speed, precision, and convenience, taking the guesswork and strain out of fastening smaller pieces of wood.
The Magic of Cordless Freedom
Gone are the days of lugging around bulky air compressors and wrestling with tangled hoses. A battery-powered brad nailer offers complete freedom of movement.
No Cords, No Hoses: This is the biggest game-changer. You can move around your workspace or project site without any restrictions.
Quick Setup: No need to connect air lines, check pressure, or worry about leaks. Just grab your nailer, pop in a charged battery, and you’re ready to go.
Portability: Take it anywhere! Whether you’re working in your garage, on a ladder, or even at a client’s home, your battery-powered brad nailer is ready to travel.
Precision Meets Speed
Brad nailers drive thin, small-headed nails (brads) that are perfect for joining delicate trim, assembling furniture, or attaching thin panels. A battery-powered version does this with impressive speed and accuracy.
Consistent Fastening: Each nail is driven consistently, providing a strong hold without splitting the wood. This is crucial for a professional finish.
Reduced Fatigue: Squeezing a trigger is far less tiring than repeated hammering, especially over long projects.
Versatility: From delicate molding to cabinet doors, these nailers handle a wide range of small to medium-sized tasks with ease.
Perfect for Beginners
If you’re new to woodworking or DIY, a battery-powered brad nailer is an excellent tool to start with. Its ease of use and forgiving nature make it less intimidating than some other power tools.
Less Risk of Damage: Unlike a hammer, it’s much harder to accidentally dent or mar your workpiece when using a brad nailer.
Straight Nails: It’s simple to get a nail driven straight and flush, giving your projects a clean, professional look from the start.
Learn by Doing: With a battery-powered brad nailer, you can focus on the assembly itself, quickly learning how pieces fit together without the added stress of perfect hammer strikes.
Understanding Your Battery-Powered Brad Nailer
Before we dive into how to use one, let’s get familiar with the different parts and types of battery-powered brad nailers you might encounter. Knowing your tool is the first step to using it effectively and safely.
Key Components
Most battery-powered brad nailers share a few common parts:
Nail Firing Mechanism: This is the business end of the tool, where the nail is propelled into the wood.
Nail Magazine: This holds a strip of brad nails. It’s usually adjustable to accommodate different nail lengths.
Trigger: This fires the nail. Some have safety triggers that require you to press the nose of the tool to the wood before firing.
Depth Adjustment Wheel: This allows you to control how deep the nail drives into the wood. Crucial for not sinking the nail too deep or leaving it proud.
Battery Port: Where the rechargeable battery pack connects.
Belt Clip: A handy feature for keeping the tool within reach.
LED Work Light: Many modern nailers include a light to illuminate your work area.
Types of Battery-Powered Brad Nailers
While all battery-powered brad nailers offer cordless convenience, there’s a distinction based on their power source and technology:
18V/20V Max Cordless Brad Nailers: These are the most common type for DIYers. They use a rechargeable lithium-ion battery, similar to those used in other cordless power tools. They offer a great balance of power, portability, and runtime.
Fuel Cell/Gas Nailers: While battery-powered, some nailers use a small, disposable fuel cell (like propane or butane) to provide the power for each shot, with a battery solely for the ignition and fan. These can be powerful but require consumables. For simplicity and ease of use, especially for beginners, the 18V/20V Max battery-powered models are generally preferred.
What to Look For in a Battery-Powered Brad Nailer
When choosing your first battery-powered brad nailer, consider these factors:
Battery Compatibility: If you already own tools from a particular brand (e.g., DeWalt, Ryobi, Milwaukee), check if the brad nailer uses the same battery platform. This can save you money.
Nail Size Capacity: Ensure it can handle the lengths of brads you’ll commonly use. Most handle lengths from 5/8 inch up to 2 inches.
Weight and Ergonomics: A lighter tool that feels comfortable in your hand will make your projects much more enjoyable.
Features: Look for features like tool-less jam clearing, depth adjustment, belt clip, and an LED work light.
Brand Reputation and Reviews: Read reviews from other users to get an idea of reliability and performance. Reputable brands like Bostitch, DeWalt, Paslode, and Ryobi offer solid options.
Essential Accessories for Your Brad Nailer
Beyond the nailer itself, a few accessories will ensure you get the most out of your tool and stay safe.
Must-Have Accessories
Brad Nails: You absolutely need the right size and type of brad nails. Ensure you purchase nails specifically designed for brad nailers, matching the gauge (thickness) and length your tool requires. For example, 18-gauge brads are common for trim and furniture assembly. A good resource for understanding nail types is the WoodworkingTrade.com guide on lumber dimensions, as precise fastening is key to matching wood sizes.
Safety Glasses: This is non-negotiable. Always wear safety glasses to protect your eyes from flying debris or ricocheting nails.
Spare Batteries: For extended projects, a second fully charged battery means you won’t have to stop and wait for a recharge.
Charger: Obviously, you’ll need the charger compatible with your tool’s batteries.
Tool Bag or Case: To keep your nailer, batteries, charger, and nails organized and protected.
Nice-to-Have Accessories
Different Nail Gauges: While 18-gauge is common, you might find yourself needing 16-gauge (slightly thicker, stronger hold) for certain tasks.
Nose Piece Covers: Some nailers come with non-marring tips that can be placed over the nose to prevent damage to soft woods or finished surfaces.
Worksite Hearing Protection: While brad nailers are quieter than framing nailers, prolonged use can still be noisy.
How to Use Your Battery-Powered Brad Nailer: A Step-by-Step Guide
Ready to put your new tool to work? Follow these simple steps for safe and effective operation. Safety is always our top priority at Nailerguy!
Step 1: Safety First!
Before you even load a nail, ensure you’re ready to operate safely.
1. Read Your Manual: Every tool is slightly different. Familiarize yourself with your specific model’s instructions and warnings.
2. Wear Safety Glasses: Always, always, always wear your safety glasses.
3. Inspect the Tool: Check for any visible damage to the nailer or the battery. Ensure the battery is securely attached.
4. Understand the Trigger/Safety Mechanism: Know whether your nailer has a contact-trip (bump fire) or sequential-actuation trigger and how to engage/disengage the safety lock. For most projects, especially trim work and furniture assembly, sequential actuation is safer as it prevents accidental firing.
Step 2: Load the Brad Nails
Loading is usually straightforward, but the exact mechanism can vary.
1. Release Latch: Locate the latch or lever that opens the nail magazine. This is often at the rear or front of the magazine.
2. Open Magazine: Slide or lift the magazine open.
3. Insert Nails: Place a strip of brad nails into the magazine. Ensure they are seated correctly against the driver guide. The heads of the nails should be facing upwards.
Orientation is Key: Most nailers have a specific way the nails need to lie in the magazine; check your manual if unsure.
4. Close Magazine: Slide or close the magazine securely until the latch clicks into place.
5. Test Fire (Dry Fire): With the safety engaged and the tool pointed away from anyone or anything, gently squeeze the trigger to ensure the mechanism is working and the nails are ready to fire. You should hear a click and a slight movement of the internal parts.
Step 3: Adjust Depth Setting
This is crucial for a clean finish. You want the nail head to be flush with the surface or slightly countersunk, not sticking out or driven so deep it blows through the wood.
1. Locate Depth Wheel: Find the adjustment dial, usually located near the nose of the nailer.
2. Test on Scrap Material: Use a piece of scrap wood identical to what you’ll be working on.
3. Set and Test:
Start with a medium setting.
Place the nose of the nailer firmly against the scrap wood and squeeze the trigger.
Examine the nail. If it’s too deep, turn the adjustment wheel the opposite direction (usually counter-clockwise for shallower). If it’s too proud (sticking out), turn it the other way (usually clockwise for deeper).
Repeat testing until you achieve the desired depth. Don’t forget that softer woods will require less depth, harder woods more.
Getting the depth right ensures a professional look. For furniture assembly, you might want the nail heads slightly countersunk so they can be easily filled with wood putty. For trim, flush or just slightly below the surface is often ideal.
Step 4: Position the Nailer and Fire
Now for the actual fastening!
1. Position the Workpiece: Ensure your material is securely in place. Use clamps if necessary.
2. Place the Nailer: Position the nose of the brad nailer firmly against the surface where you want to drive the nail. Ensure it’s making good contact.
3. Engage Safety (if sequential): If your nailer has a contact-trip trigger, you’ll need to press the nose to the wood.
4. Squeeze the Trigger: Gently squeeze the trigger to fire the nail.
5. Withdraw the Nailer: Carefully lift the nailer away from the workpiece.
6. Repeat: Move to the next desired nail location and repeat the process.
Step 5: Clearing Jams (Hopefully Rare!)
Even with the best tools, jams can happen. Most modern brad nailers are designed for easy clearing.
1. Ensure Safety: Remove the battery to completely de-power the tool.
2. Locate Jam Release: Most nailers have a latch or lever to open the nosepiece or driver assembly. Consult your manual.
3. Remove Obstruction: Carefully remove any bent or jammed nails using pliers if necessary.
4. Close and Re-battery: Once clear, close the nosepiece, re-insert the battery, and you should be good to go.
Battery-Powered Brad Nailers for Furniture Assembly
This is where battery-powered brad nailers truly shine! Building or repairing furniture requires precise connections, and a brad nailer makes it incredibly efficient.
Why They’re Perfect for Furniture
Joining Cabinet Frames: Quickly and securely attach face frames to cabinet boxes.
Attaching Drawer Slides: Mount drawer slides without fuss.
Securing Back Panels: Easily attach thin plywood or hardboard back panels to cabinets and bookcases. This adds significant rigidity.
Assembling Drawer Boxes: Construct drawer boxes by nailing the sides to the drawer front and back.
Attaching Trim and Moldings: Add decorative trim to furniture pieces for a custom look.
Repair Work: Quickly fix loose joints or reattach decorative elements on existing furniture.
Example Scenario: Building a Simple Bookshelf
Imagine you’re building a basic bookshelf. You’ve cut your sides, shelves, and back panel.
1. Assemble the Box:
Stand up the two side panels.
Position the top and bottom shelves.
Use your battery-powered brad nailer to drive brads through the side panels into the ends of the top and bottom shelves. A few brads on each side are usually sufficient.
2. Add Middle Shelves:
Slide in any middle shelves and nail them from the outside of the side panels.
3. Attach the Back Panel:
Lay the bookshelf face down.
Position the thin back panel.
Use your brad nailer to secure the back panel all around the edges and into the shelves. This step is critical for squaring up the unit and adding stability.
The speed and ease of this process compared to trying to hammer tiny nails accurately into the edges of shelves make a huge difference. For a project like this, having a battery-powered brad nailer for furniture assembly can cut your build time in half and significantly improve the final look.
Top Uses for Your Battery-Powered Brad Nailer Beyond Furniture
While furniture assembly is a major win, don’t stop there! Your battery-powered brad nailer is a versatile workhorse for many other DIY and woodworking tasks.
Trim and Molding Installation
This is arguably the most common application for brad nailers.
Baseboards: Attach baseboards to walls with ease. The small brad heads are easily concealed or filled.
Window and Door Casing: Frame out windows and doors with perfect precision.
Crown Molding: While larger nailers are sometimes preferred for heavy crown molding, lighter profiles can be handled effectively.
Wainscoting and Paneling: Install decorative wall panels or wainscoting systems.
DIY Home Improvement Projects
Your brad nailer can help with numerous home improvement tasks.
Picture Frames: Build custom picture frames quickly.
Birdhouses and Mailboxes: Construct small outdoor projects with a neat finish.
Small Shelving Units: Assemble simple shelves for garages, workshops, or decorative displays.
Repairing Furniture: Reattach loose trim, miter joints, or decorative elements.
Attaching Vents or Grilles: Securely but discreetly attach metal or plastic grilles.
Crafting and Smaller Projects
Hobbyists and crafters can also benefit greatly.
Model Building: For larger scale models or detailed projects where precise fastening is needed.
Small Wooden Boxes: Create decorative or functional small boxes.
* Custom Gifts: Build personalized wooden gifts.
Comparing Battery-Powered to Pneumatic Brad Nailers
For those considering their first brad nailer, distinguishing between battery-powered and traditional pneumatic (air-powered) options is essential.
| Feature | Battery-Powered Brad Nailer | Pneumatic Brad Nailer |
| :—————- | :————————————————————— | :——————————————————— |
| Power Source | Rechargeable Lithium-Ion Battery | Air Compressor and Air Hose |
| Portability | High (no cords or hoses) | Limited (requires compressor and hose) |
| Setup Time | Very Fast (insert battery, load nails) | Slower (connect hose, set compressor pressure) |
| Cost (Initial)| Higher (nailer + batteries + charger) | Lower (nailer is cheaper, but compressor is a significant cost) |
| Cost (Ongoing)| Minimal (electricity for charging batteries) | Moderate (electricity for compressor) |
| Power/Speed | Excellent, modern models rival pneumatic | Very High, can be more consistent on heavy use |
| Noise Level | Moderate | High (nailer + compressor) |
| Weight | Generally heavier due to battery and motor | Lighter (nailer itself), but hose can add to perceived weight |
| Maintenance | Minimal (battery care, occasional cleaning) | Regular (oil air line, check seals, compressor maintenance)|
| Best For | DIYers, homeowners, trim work, furniture, portability needs | Pro contractors, high-volume use, dedicated workshops |
For the average DIY homeowner looking for effortless assembly, the convenience and freedom of a battery-powered brad nailer far outweigh the initial cost. The ease