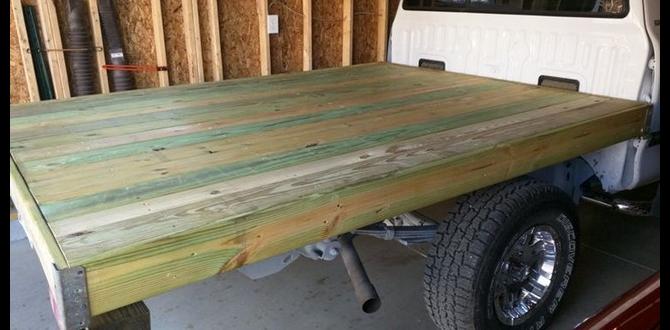
Have you ever wished you could turn logs into lumber? Imagine how much fun it would be to create your own boards and beams! A bandsaw log mill DIY project could make this dream come true.
With a bandsaw log mill, you can easily cut logs into planks. It’s like magic! You can use these planks for your future woodworking projects or even build furniture. Plus, it’s a great way to recycle fallen trees from storms.
Building your own log mill may sound tricky, but it is easier than you think. Many people have created their own versions at home. You will feel proud of your work and amazed at what you can create.
So, are you ready to explore this exciting DIY adventure? Let’s dig into where to start and how to make your own bandsaw log mill!
Table of Contents
Bandsaw Log Mill Diy Project: Crafting Your Own Timber Tools

Bandsaw Log Mill DIY Project: Unlock Your Creativity
Building a bandsaw log mill can be a fun and rewarding DIY project. Imagine transforming logs into usable lumber right in your backyard! With a few tools and materials, you can create your own mill that cuts logs efficiently. DIY bandsaw mills save money and help you become self-sufficient. Plus, it’s a great way to recycle wood from fallen trees. This project invites you to explore woodworking while learning new skills. Are you ready to start your milling adventure?Essential Tools and Materials
List of necessary tools for building a bandsaw log mill. Recommended materials and their specifications.To build a bandsaw log mill, you need some important tools and materials. Here is a list of what you will need:
- Band saw: Choose a model with a strong motor.
- Woodworking clamps: These hold your wood in place while you work.
- Metal frame: Use steel tubing for strength.
- Wheels: Get durable wheels to help move the log mill easily.
- Blade: A 1-inch wide blade is ideal for cutting logs.
Having the right tools makes the project easier and more fun!
What materials do I need for a bandsaw log mill?
To build the mill, you’ll need strong materials. Use metal for the frame, wood for the log supports, and quality blades. This ensures your mill is safe and works well.
Planning Your DIY Bandsaw Log Mill
Importance of detailed design and blueprints. Factors to consider: size, capacity, and location.Creating a DIY bandsaw log mill is an exciting adventure! But first, you need a solid plan. Detailed designs and blueprints are crucial. They guide you and help avoid missteps. Size matters, too. Think about how big your logs will be. Capacity is key to ensure your mill can handle them. Also, pick the right location. You don’t want your mill in a spot where it might trip over a rogue squirrel!
| Factor | Consideration |
|---|---|
| Size | Width and length of logs |
| Capacity | How many logs you’ll cut |
| Location | Flat, open space with good access |
Step-by-Step Construction Process
Foundation and frame construction. Assembling the bandsaw mechanism.Start by building a strong foundation using sturdy materials. Make sure it’s level and safe. Next, build the frame. This is where your bandsaw log mill will stand. You can use wood or metal for strength. Then, assemble the bandsaw mechanism. Attach parts carefully for smooth operation. Double-check everything to avoid issues later on.
How do I build the foundation for my bandsaw log mill?
Begin with solid ground. Use concrete blocks or wood beams for a strong base. Ensure it is flat and stable.
Foundation Steps:
- Clear the area.
- Measure dimensions.
- Place supports evenly.
What materials do I need for the frame?
You’ll need wood or metal beams. These materials will give your frame strength and stability.
Frame Materials:
- Wood planks
- Metal pipes
- Bolts and screws
Safety Precautions
Key safety measures to implement while building and operating. Personal protective equipment (PPE) recommendations.Working with a bandsaw log mill can be exciting, but safety is very important. Always wear protective gear to keep yourself safe. This includes:
- Safety glasses to protect your eyes from flying debris.
- Hearing protection to guard against loud noises.
- Gloves to protect your hands from cuts.
- Steel-toed boots to protect your feet from heavy logs.
Check your surroundings. Keep the area clean and well-lit. Follow these safety measures, and you can enjoy building with confidence!
What are the key safety measures for using a bandsaw log mill?
Important safety measures include wearing PPE, keeping a clean workspace, and staying focused on your tasks.
Why is personal protective equipment important?
PPE helps prevent injuries from dangerous tools and materials.
Performance Tips and Maintenance
How to optimize the efficiency of your bandsaw log mill. Routine maintenance practices for longevity.To make your bandsaw log mill work like a well-oiled machine, focus on a few simple tricks. First, always keep the blades sharp. Dull blades can lead to frustrating jams and less wood power! Clean the mill often to avoid a woodsy buildup. Routine checks on all parts can prevent surprises. Think of it as a spa day for your saw! Regular maintenance can double its lifespan too. Here’s a quick table of what to do:
| Task | Frequency |
|---|---|
| Check blade sharpness | Before each use |
| Clean dust and debris | After each use |
| Inspect the motor | Monthly |
| Oil moving parts | Every few months |
With these tips, your bandsaw will sing like a happy little bird. Keep it happy, and it will keep you happy back!
Common Challenges and Solutions
Typical issues faced during construction or operation. Effective troubleshooting techniques.Building a bandsaw log mill can feel like a wild ride! Common problems often pop up during construction and while you’re in full slicing mode. For example, if the saw blade binds, it may require a quick check of the alignment. Another issue could be uneven cuts, which might mean your logs are playing tricks on you! Effective troubleshooting involves checking your settings and keeping everything nice and tidy.
| Issue | Solution |
|---|---|
| Blade Binding | Check alignment and tension. |
| Uneven Cuts | Ensure logs are securely positioned. |
| Excessive Vibration | Inspect and tighten components. |
Remember, even pros face these little gremlins. So, grab your toolbelt, and let’s tackle these challenges together!
Real-Life Examples and Case Studies
Success stories from DIY enthusiasts. Lessons learned and best practices shared by the community.Many DIY enthusiasts have successfully built their own bandsaw log mills. They share stories about their projects, which inspire others. Here are some success stories and lessons learned:
- One builder turned scrap wood into a fully functioning mill.
- Another person learned to modify the design for better accuracy.
- Many found that teamwork made the project easier and more fun.
Sharing best practices helps everyone improve. Learning from others’ mistakes keeps projects running smoothly. Community members offer tips and support. These real-life examples show that anyone can succeed with a bit of creativity and hard work.
What are some tips from DIY bandsaw log mill builders?
Always measure twice, cut once. Having the right tools is essential for a good job. Enjoy learning and don’t be afraid to ask for help!
FAQs about Bandsaw Log Mills
Common questions answered about bandsaw log mills. Expert insights to enhance understanding and project success.Many people wonder about bandsaw log mills. Here are some common questions with answers that can help you understand them better. First, you might ask, “What exactly can I cut?” Well, you can cut logs into lumber of various sizes! Another question is, “Are they easy to use?” The answer is yes! With a little practice, you’ll be sawing like a pro. Lastly, some are curious about safety. Always wear goggles and gloves. After all, no one wants to end up looking like a lumberjack at a costume party!
| Question | Answer |
|---|---|
| What can I cut? | Logs into lumber! |
| Is it easy to use? | Yes! |
| How about safety? | Always wear safety gear! |
Conclusion
In conclusion, a bandsaw log mill DIY project can be fun and rewarding. You can turn logs into planks for your woodworking projects. We’ve learned about tools, materials, and safety tips. Start small and take your time. If you’re eager to learn more, check out online tutorials or woodworking books for guidance. Happy building!FAQs
What Are The Essential Materials And Tools Needed To Build A Diy Bandsaw Log Mill?To build a DIY bandsaw log mill, you need some important stuff. First, get a bandsaw. You’ll also need a sturdy frame made of wood or metal to hold everything together. Don’t forget wheels to move the logs easily. Finally, gather tools like a drill, screws, bolts, and a measuring tape to put it all together.
How Do You Design The Frame And Structure Of A Bandsaw Log Mill For Optimal Stability And Cutting Efficiency?To design a strong frame for a bandsaw log mill, you first need sturdy materials like steel or wood. Make sure the base is wide and heavy so it doesn’t tip over while cutting. Use strong supports to hold the saw in place and keep it steady. Also, make the cutting area clear so the logs move smoothly. This design will help you cut better and safer!
What Safety Precautions Should Be Taken When Operating A Bandsaw Log Mill To Prevent Accidents?When using a bandsaw log mill, you should always wear safety glasses to protect your eyes. Keep your hands away from the blade and use push sticks to move the wood. Make sure the machine is off before cleaning it or changing the blade. Never wear loose clothing that might get caught in the saw. Always pay attention and don’t rush while you work.
How Can You Adjust The Bandsaw Blade Tension And Alignment To Ensure Precision Cutting On Your Log Mill?To adjust the bandsaw blade tension, turn the tension knob until the blade feels tight but not too tight. To check alignment, you can use a straight edge. Place it against the blade and see if it runs straight. If it’s not straight, adjust the wheels to make it right. This helps your cuts be smooth and accurate.
What Techniques Are Recommended For Properly Feeding Logs Into A Bandsaw Log Mill To Achieve Consistent Lumber Thickness?To feed logs into a bandsaw log mill, start by securing the log so it doesn’t move. Use a straight edge to check that the log is level. This helps make even cuts. Feed the log slowly and steadily. Keep an eye on the thickness as you cut to make sure it stays uniform.