Quick Summary:
Avoid splitting wood by choosing the right fasteners, pre-drilling pilot holes for hardwoods, using the correct nail gun settings, and selecting appropriate wood types for your project. These simple steps ensure strong, clean joints every time.
If you’ve ever been working on a project and heard that dreaded crack as your wood splits, you know how frustrating that can be. It’s a common problem, especially when you’re new to woodworking or using power tools. But don’t worry! Splitting wood is usually a sign that something simple in your technique or material choice can be adjusted.
This guide is packed with easy-to-understand tips that will help you avoid splits, keep your projects looking professional, and boost your confidence. We’ll break down everything from choosing the right nails to understanding your nail gun. Let’s get your woodworking looking sharp!
Table of Contents
Why Does Wood Split? Understanding the Basics
Wood is a natural material, and like anything natural, it has its quirks. The main reason wood splits is due to internal stresses caused by fasteners or changes in moisture. When you drive a nail or screw into wood, you’re pushing the wood fibers apart. If the forces are too great, or if the wood is weaker in certain areas, it can’t handle the stress and cracks.
Think of it like trying to push a very sharp pencil through a piece of soft cheese versus a hard block of wood. The cheese might deform, but the wood might break. Different types of wood have different densities and grain patterns, which affects how they react to fasteners. Hardwoods, for example, are denser and require more care than softwoods.
Understanding these basic principles makes it much easier to prevent those annoying splits. It’s all about working with the wood, not against it.
Choosing the Right Fasteners: The First Line of Defense
The type and size of fastener you use are critical in preventing wood splits. Using a nail or screw that’s too large or too driven for the wood can easily cause it to break apart.
Nails vs. Screws: When to Use Each
Both nails and screws are common in woodworking, but they perform differently.
Nails: Generally faster to drive, especially with a nail gun. They create a strong hold through friction and mechanical interlocking. However, they can be more prone to splitting wood directly, especially if they are too thick or driven too close to an edge.
Screws: Offer superior holding power and allow for disassembly if needed. They are less likely to cause immediate splitting if pre-drilled, as their threads help pull the wood around them.
Nail Sizes and Gauges
When using nails, size matters. A thicker nail (lower gauge number) is stronger but also more likely to split wood. A thinner nail (higher gauge number) is less likely to split, but might not have the same holding power.
Here’s a general guide for common nail sizes and their typical uses, keeping in mind that actual wood density will play a role:
| Nail Size | Gauge | Diameter (in) | Common Uses | Risk of Splitting (Relative) |
| :————– | :—- | :———— | :————————————————— | :————————— |
| 18-Gauge Brad | 18 | 0.039 | Trim, delicate molding, small crafts | Very Low |
| 16-Gauge | 16 | 0.0625 | Baseboards, crown molding, general carpentry | Low |
| 15-Gauge Finish | 15 | 0.072 | Door casings, window trim, furniture construction | Medium- |
| 8d (Common) | ~6-8 | 0.135-0.162 | Framing, heavier structural work | High |
| 10d (Common) | ~8-9 | 0.148-0.177 | Framing, decking, heavier structural work | Very High |
For many DIY projects where you want to avoid splitting, especially with finer woods or near edges, opting for thinner nails like 18-gauge brads or 16-gauge finish nails is a smart move.
Screw Length and Diameter
Similar to nails, the length and diameter of screws are important.
Length: Ensure the screw is long enough to get good penetration into the adjoining piece of wood, but not so long that it pokes through the other side. A good rule of thumb is to have about two-thirds of the screw length embedded in the second piece of wood.
Diameter: Thinner screws are less likely to split wood. For hardwoods or when working near edges, consider using thinner gauge screws.
Pre-Drilling Pilot Holes: Your Secret Weapon
This is arguably the most effective way to prevent wood splitting, especially with hardwoods or when driving fasteners close to the edge of the wood. A pilot hole is a small hole drilled before you drive your nail or screw.
When to Pre-Drill
Hardwoods: Woods like oak, maple, and cherry are dense and will split if you try to drive a fastener directly into them without a pilot hole.
Near Edges or Ends: Wood is weakest at its edges and ends. Driving a fastener too close to these areas without a pilot hole is a recipe for splits.
Large or Thick Fasteners: If you must use a thick nail or screw, pre-drilling is essential.
Joining Very Dry Wood: Dry wood is more brittle and prone to splitting.
How to Pre-Drill Effectively
1. Choose the Right Drill Bit:
For Screws: Use a drill bit that is slightly smaller in diameter than the screw’s shaft (the solid part beneath the threads). You want the threads to still be able to bite into the wood. Some specialized drill bits or countersink bits can do both drilling and create a clean recess for the screw head.
For Nails: Use a drill bit that’s about the same diameter as the nail’s shank (the smooth part). This provides a pathway for the nail without actually weakening the wood too much.
2. Drill the Hole:
Drill straight into the wood, perpendicular to the surface.
The depth of the pilot hole should be sufficient for the shank of your nail or screw. For screws, it should be at least as deep as the unthreaded portion of the screw shank.
Using a good quality drill bit will make this process much smoother and more accurate. Companies like DeWalt, Bosch, and Milwaukee offer excellent drill bits suitable for various wood types.
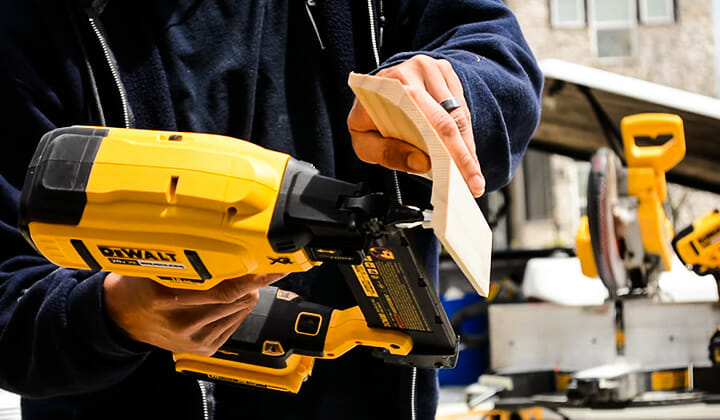
Mastering Your Nail Gun Settings: A Game-Changer
If you’re using a nail gun, you have a powerful tool that can speed up your work significantly. However, incorrect settings are a common cause of wood splitting.
Depth Adjustment
Most nail guns have a depth adjustment feature. This controls how deep the nail is driven into the wood.
Too Deep: Driving the nail too deep can crush the wood fibers around it, leading to splits. It can also cause the nail to go too far into the next piece of material, damaging it.
Too Shallow: The nail head might sit proud of the wood surface, which looks unprofessional and can be a snag hazard.
How to Set It: Always test your depth adjustment on scrap pieces of the same wood you’re using for your project. Start with a medium setting and adjust finer as needed. You want the nail head to be slightly countersunk below the surface for a clean finish, but not so deep that it breaks through or stresses the wood.
Air Pressure (for Pneumatic Nailers)
For pneumatic nail guns, the air pressure (measured in PSI – pounds per square inch) is crucial. Too much pressure can drive nails with excessive force, splitting the wood. Too little pressure won’t drive the nail fully.
Consult the Manual: Your nail gun’s manual will provide recommended PSI ranges for different types of nails and wood.
Start Lower: It’s generally safer to start with a lower PSI and gradually increase it until your headless nails are driven correctly.
Consider Compressor Output: Ensure your air compressor can provide consistent pressure. A fluctuating PSI can lead to inconsistent nail depth and potential splits. Reputable compressor brands include California Air Tools and Senco.
Choosing the Right Nail Gun for the Job
Different nail guns are designed for different tasks. Using the wrong type can also contribute to issues.
Brad Nailer (18-gauge): Great for fine trim, molding, and crafts. These use very thin nails and are less likely to split wood.
Finish Nailer (15- or 16-gauge): Suitable for baseboards, door casings, and furniture. Offers a good balance of holding power and minimal splitting potential compared to larger nails.
Framing Nailer (e.g., 8d, 10d): Designed for heavy-duty structural work like framing buildings. These drive thick nails with significant force and are much more likely to split wood if not used carefully. For most DIY projects around the house where you’re not building a deck frame from scratch, you’ll likely be using brad or finish nailers.
Wood Selection: Does the Type of Wood Matter?
Absolutely! The inherent properties of the wood you choose play a significant role in its susceptibility to splitting.
Hardwood vs. Softwood
Hardwoods: Come from deciduous trees (trees that lose their leaves annually). Examples include oak, maple, walnut, and cherry. They are generally denser, stronger, and more durable but also more prone to splitting when fasteners are driven without proper preparation (like pilot holes).
Softwoods: Come from coniferous trees (evergreens). Examples include pine, fir, and cedar. They are typically less dense, easier to work with, and less likely to split. However, they are also softer and can be dented or scratched more easily.
For beginner projects where avoiding splits is a priority, softwoods like pine or fir are often easier to work with. If you must use hardwoods, be diligent with pre-drilling.
Grain Patterns and Knots
Grain Direction: Driving a nail parallel to the wood grain is more likely to cause splitting than driving it perpendicular to the grain.
Knots: Knots are denser areas in the wood. Fasteners driven into or very near a knot are significantly more likely to cause splitting due to the increased resistance and internal stress. Try to avoid placing fasteners in or immediately next to knots whenever possible.
Wood Acclimation
Wood can change dimensions and internal stresses based on humidity. Allowing wood to acclimate to the environment where it will be used (e.g., inside your home before installing trim) can help reduce the risk of splitting due to movement. This process typically involves letting the wood sit in the intended environment for a few days to a week.
Strategic Fastener Placement: Thinking Before You Drive
Where you place your nails or screws can be just as important as what you use.
Distance From Edges and Ends
As mentioned, wood is weakest at its edges and ends. A general guideline is to keep fasteners at least 1 to 1.5 inches away from the edge of the board and at least 2 inches away from the end of the board when possible. Whenever you need to fasten closer than this, pre-drilling becomes essential.
Spacing of Fasteners
Don’t put too many fasteners too close together. This creates multiple stress points that can weaken the wood and lead to splits between the fasteners.
For trim and molding: Spacing fasteners about every 16 to 24 inches is usually sufficient.
For structural joints: Spacing will depend on the load and type of joint, but avoid bunching them up.
Pre-Drilling Strategically
When pre-drilling, aim to center the pilot hole where you want the fastener to go, but also consider the wood grain. If the grain runs parallel, drilling slightly off-center might allow it to hug the grain better without splitting.
Working with Different Wood Types: Specific Tips
Let’s look at how to tackle common wood types:
Pine and Other Softwoods
Softwoods are generally forgiving. You can often get away with driving nails or screws directly, especially if they are thinner gauges (18-gauge brads or 16-gauge finish nails for a nail gun, or appropriately sized screws). However, if you are working with very thin pieces (like craft wood) or driving fasteners very close to the edge, pre-drilling is still a good idea to ensure a clean finish and strong hold.
Oak and Other Dense Hardwoods
Oak, maple, hickory, and similar hardwoods demand respect. For any fastener thicker than an 18-gauge brad or a very thin screw, always pre-drill a pilot hole. The pilot hole for screws should be about 50-75% of the screw’s minor diameter (the shaft). For nails, it should be about the same diameter as the nail shank. This makes driving much easier and virtually eliminates the risk of splitting.
Plywood and MDF
These engineered wood products behave differently.
Plywood: Generally less prone to splitting than solid hardwoods if fasteners are driven perpendicular to the grain layers you see on the surface. However, driving fasteners at an angle or near the very edge of plywood can still cause delamination or splitting. Pre-drilling is recommended when screwing near edges.
MDF (Medium-Density Fiberboard): MDF is dense but crumbly. It holds screws very well into the face but has almost no edge strength. Driving screws into the edge of MDF will almost certainly cause it to crumble and split. If you need to join MDF edges, specialized joinery methods or adhesives are usually better than fasteners. If you must use screws, use them in the face of the board and ensure they are not too close together. Pre-drilling for screws is often beneficial even into the face to prevent the dense material from crushing around the screw threads.
How to Avoid Splitting Wood with a Nail Gun: A Quick Checklist
This is a common scenario for DIYers, so let’s focus on nail guns:
Use the Right Nail Size: Match your nail gun’s capacity and the job’s needs. Thinner nails (higher gauge) split wood less.
Test Depth Settings: Always test on scrap wood. Aim for a slight countersink, not crushing.
Adjust Air Pressure: Start low and increase gradually. Avoid excessive force.
Pre-drilling is Your Friend: Especially for hardwoods, dense grain, or near edges/ends.
Positioning Matters: Avoid knots and areas too close to edges.
Consider Nail Gun Type: A brad or finish nailer is usually better for fine woodworking than a framing nailer.
If you’re struggling with a specific nailer, checking the manufacturer’s recommendations for optimal settings is always a good idea. For example, Senco offers a wealth of information on their website regarding nailer use and best practices.
Repairing Split Wood (If It Happens Anyway!)
Sometimes, despite our best efforts, a small split can occur. Don’t despair; many splits can be repaired.
For minor splits: You can often use wood glue. Apply a generous amount into the split. Then, carefully clamp the wood back together. You might need to use painter’s tape to hold it in place if clamping is difficult. Wipe away any excess glue before it dries.
For larger splits or if the wood is truly broken: You may need to fill the gap with wood filler or epoxy after gluing and clamping. Choose a filler that matches your wood color if you plan to stain or a paintable filler if you’re painting.
* Acceptance: For some projects, especially rustic ones, a minor split might even add character!
Frequently Asked Questions (FAQ)
What is the most common reason wood splits when nailing?
The most common reasons wood splits when nailing are using a nail that is too thick for the wood, driving the nail too close to the edge or end of the wood, or not pre-drilling a pilot hole, especially in hardwoods or dense areas like knots.
Can I use a nail gun on hardwood without splitting the wood?
Yes, you absolutely can use a nail gun on hardwood without splitting the wood. The key is to use the correct nail size (often thinner nails), adjust your nail gun’s depth setting carefully, ensure your air pressure isn’t too high, and most importantly, pre-drill pilot holes, especially when fastening near edges or ends.
What is a pilot hole and why is it important?
A pilot hole is a small hole drilled into the wood before driving a nail or screw. It’s important because it creates a channel for the fastener, reducing the friction and pressure on the wood fibers. This prevents the wood from being forced apart and splitting.
How close can I safely put a nail or screw to the edge of a board?
A good rule of thumb is to keep fasteners at least 1 to 1.5 inches from the side edge and at least 2 inches from the end of a board to avoid splitting. If you need to place a fastener closer than this, always pre-drill a pilot hole.
Does the type of wood affect how easily it splits?
Yes, definitely. Hardwoods like oak and maple are denser and more prone to splitting than softwoods like pine or fir. Engineered woods like MDF have very poor edge strength and can crumble easily. Wood with knots or irregular grain patterns is also more susceptible to splitting.
What if I don’t have a nail gun? Can I still avoid splitting when hammering nails?
Absolutely. The same principles apply. Use the right size hammer and nail. For hardwoods or difficult spots, start a nail by tapping it gently with a hammer, then use a nail set to drive it the rest of the way if it’s a brad or finish nail. For larger nails or stressed areas, manually hammer a pilot hole first before driving the nail home