Quick Summary: To avoid scratches when using a nail gun, always use a depth adjustment feature, employ a no-mar tip, maintain a proper angle, use the right nail size, and practice on scrap wood first. This prevents unsightly marks on your project surfaces.
Hey there, fellow DIYers! Jack Shaffer here from Nailerguy. Ever been so excited about a project, only to have your nail gun leave little dings and scratches on your beautiful wood? It’s a frustration we’ve all faced. That pristine surface you worked so hard on can suddenly look… less than perfect. But don’t worry! With a few smart techniques and some handy tips, you can master your nail gun and keep your projects looking professional and scratch-free. We’re going to walk through exactly how to achieve that smooth finish. Get ready to nail it – without the nicks!
Table of Contents
Why Nail Gun Scratches Happen (and How to Stop Them)
Those annoying scratches from a nail gun often occur because the tip of the nailer digs into the wood surface as it drives the nail. Sometimes, it’s the metal nose of the gun itself making contact. Other times, it’s the force of the nail being driven at an angle or the nail head not sitting flush. Understanding these causes is the first step to preventing them. Let’s dive into the smart strategies that will save your projects from unnecessary damage.
The Essential Toolkit for Scratch-Free Nailing
Before we get into the technique, having the right accessories can make a world of difference. These aren’t complicated, but they are game-changers for protecting your wood.
- No-Mar Tips: These are usually made of rubber or a soft plastic and fit over the nose of your nail gun. They act as a buffer between the metal gun and your wood.
- Depth Adjustment Feature: Most modern nail guns have a depth-of-drive adjustment. This is crucial for controlling how deep the nail penetrates.
- Safety Glasses: Always, always wear safety glasses! While not directly for preventing scratches on the wood, they protect you from flying debris if something unexpected happens.
- Gloves: Good work gloves can help you maintain a firm grip on the gun and the workpiece, reducing slips that could lead to scratches.
Genius Nail Gun Tips to Avoid Scratches: A Step-by-Step Guide
Now, let’s get down to the practical strategies. These simple steps, when followed consistently, will dramatically reduce or eliminate scratches on your projects.
1. Master the Depth Adjustment
This is arguably the most important feature for preventing scratches. You want the nail to sink just below the surface of the wood, not drive through it or leave a deep indentation around the head.
- Understand the Dial: Look for a wheel, slider, or dial on your nail gun, usually near the nose. This controls how far the drive cylinder moves and, therefore, how deep the nail goes.
- Test on Scrap: Always, always test your depth setting on a piece of scrap wood that matches what you’re working with. Use the same type of nail if possible.
- Start Shallow: Begin with the depth adjustment set to its shallowest setting. Fire a test nail.
- Adjust Gradually: If the nail isn’t sinking enough, increase the depth slightly, and test again. Repeat until the nail head is just flush or slightly below the surface without causing a significant dent.
- Consider Wood Density: Softer woods will require less aggressive depth settings than hardwoods. You might need to fine-tune for different materials.
2. Utilize the No-Mar Tip
If your nail gun came with one, or you can buy one, a no-mar tip is a lifesaver. It’s like putting a protective bumper on your nail gun.
- Attach Securely: Make sure the no-mar tip snaps on firmly. You don’t want it flying off mid-project.
- Keep it Clean: If the no-mar tip gets dirty or clogged with sawdust, wipe it clean. Debris can sometimes cause its own marks.
- How it Works: The rubber or plastic provides a soft barrier, preventing the sharp edges of the nail gun’s exhaust ports or firing mechanism from digging into the wood. It also helps stabilize the gun, reducing slips.
3. Maintain the Right Angle
The angle at which you hold your nail gun to the workpiece significantly impacts how the nail drives and how the gun itself interacts with the surface.
- Straight and True: Always aim to hold the nail gun as perpendicular (at a 90-degree angle) to the surface as possible. This ensures the nail goes in straight and the gun’s nose sits flat.
- Avoid Tilting: A tilted gun can cause the nose to contact the wood at an unfavorable angle, leading to gouges or scrapes.
- Even Pressure: Apply firm but even downward pressure only when you are ready to fire. Too much pressure can cause the gun to slip, and too little can result in a proud nail.
4. Choose the Correct Nail Size and Type
Using the wrong size or type of nail can indirectly lead to scratch issues, especially if the nail doesn’t sit properly or requires excessive force.
- Project Requirements: Select nails recommended for your specific project and the thickness of the materials you’re joining.
- Nail Head Size: Ensure the nail head is appropriately sized for the application. Too small, and it might sink too deep or not hold well. Too large, and it might be difficult to countersink properly.
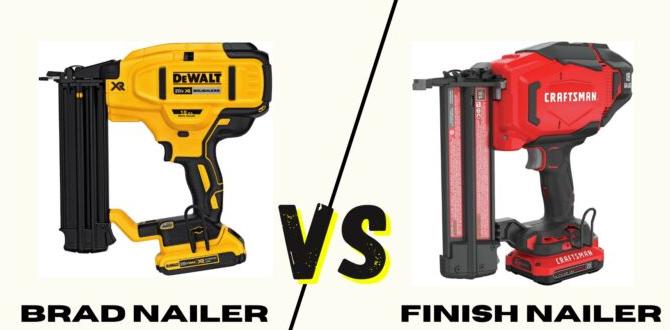
- Material Compatibility: For delicate woods or veneers, consider using finish nails or brad nails which are thinner and leave smaller holes.
For a quick reference on common nail types and their uses, check out this helpful guide from The Spruce on different types of nails.
5. Practice Makes Perfect (on Scrap!)
This is a golden rule for any tool, especially a nail gun. Before you touch your project wood, practice your technique on discarded pieces.
- Simulate Conditions: Use scrap wood that’s the same thickness and material as your project.
- Test Settings: Experiment with your depth adjustment settings on the scrap material until you consistently get the perfect nail placement.
- Perfect Your Grip: Practice holding the gun at a consistent 90-degree angle and applying steady pressure.
- Feel the Feedback: Pay attention to how the gun feels and sounds. This practice helps you develop a feel for the tool.
6. Be Mindful of Recoil and Placement
Nail guns, especially pneumatic ones, can have some recoil. This can cause the gun to jump slightly after firing, potentially marking the wood.
- Anticipate Recoil: Hold the gun firmly to absorb some of the recoil.
- Subsequent Shots: When firing multiple nails in succession or in a quick sequence, be aware that the gun might shift slightly after the first shot. Adjust your position for the next nail accordingly.
- Nail Placement Strategy: Plan where you’re going to place each nail. Avoid placing a nail too close to an edge where it might blow out the wood, and be careful not to place it too close to a previously driven nail, which could split the wood.
7. Consider the Tool’s Contact Arm
The “contact arm” – that part of the nail gun that touches the wood – is the primary culprit for scratches if not managed correctly.
- Keep it Raised: For many nail guns, the contact arm needs to be pressed firmly against the wood to allow the gun to fire. This pushing action is where many scratches originate if the gun is not held properly.
- Smooth Movement: When you move from one nailing spot to the next, lift the gun completely off the surface. Don’t drag the contact arm across the wood.
- Cleanliness is Key: Ensure the metal parts around the contact arm are clean and free of debris. Grit can easily cause scratches.
8. Working with Delicate Materials
Some wood projects are more susceptible to damage. For these, extra care is a must.
- Veneers and Softwoods: For very thin veneers or extremely soft woods, even slight pressure can cause dents. Consider using lower air pressure (if using a pneumatic nailer) and a very shallow depth setting. You might even use shims between the gun’s contact arm and the wood.
- Laminates: Laminates can chip easily. Again, a no-mar tip is your best friend here, along with a confirmed shallow depth setting.
- Pre-Finished Surfaces: If you’re nailing into pre-finished furniture or cabinetry, always test on an inconspicuous area first. A misplaced nail can mar the finish permanently.
Troubleshooting Common Scratch Issues
Even with the best intentions, you might run into a few snags. Here’s how to address them:
- Nail Not Driving Fully: If your nail isn’t sinking enough, even on the deepest setting, you may need to increase the air pressure (for pneumatic guns) or check if the nail collation is jammed. Ensure your drive blade isn’t worn out.
- Wood Splitting: This usually happens if you’re nailing too close to the end of a board or if the nail is too thick for the wood. Try using thinner nails, pre-drilling pilot holes (though this defeats the purpose of a nail gun for speed, it’s an option for critical spots), or adjusting your nail placement.
- Nail Head Proud (Sticking Up): This means your depth setting is too shallow. Adjust it deeper and test again.
- Dents Around the Nail Head: Your depth setting might be too deep, or you’re applying too much pressure. Reduce depth and be gentler with your placement.
Comparing Nailer Types and Scratch Potential
Different types of nail guns have slightly different characteristics that can influence their tendency to scratch surfaces.
| Nail Gun Type | Scratch Potential Factors | Tips for Minimizing Scratches |
|---|---|---|
| Pneumatic (Air) Nailers | High power, potential for strong recoil, metal contact nose. Can be easily adjusted with air pressure. | Use a no-mar tip, control air pressure carefully (don’t over-pressurize), master depth adjustment, maintain good grip. |
| Electric (Corded) Nailers | Generally less powerful than pneumatic, but can still mark wood. Some have integrated depth adjustment. | Focus on precise depth setting, use a no-mar tip if available, and ensure consistent application pressure. |
| Battery (Cordless) Nailers | Power varies, often have good depth control. Recoil can still be a factor. | Utilize the depth adjustment religiously, keep the contact arm flush and straight, and ensure the battery is providing consistent power for predictable firing. |
| Gas/Fuel Cell Nailers | Can be powerful, some models have adjustable depth. Ignition mechanism requires careful contact. | Always use the recommended no-mar attachment, test depth settings thoroughly, and be aware of any unique firing mechanisms that could increase marring. This is also a good time to ensure you are following the manufacturer’s guidelines for proper tool safety. |
Understanding these nuances helps you tailor your approach to the tool in hand. No matter the type, the core principles of gentle yet firm application remain the same.
When a Scratch is Unavoidable: Minor Fixes
Sometimes, despite your best efforts, a small dent or scratch happens. Don’t panic! Many minor imperfections can be fixed.
- The Damp Cloth Trick: For very minor dents where the wood grain is just compressed, place a damp cloth over the dent and gently press with a hot iron on a medium setting. The steam can help the wood fibers swell back up. Test on scrap first!
- Filling with Wood Putty: For small gouges or deeper indentations, a high-quality wood putty that matches your wood color can be used. Apply, let it dry, and then sand it smooth.
- Sanding and Refinishing: For more significant scratches, you might need to feather in the area with fine-grit sandpaper and then reapply a finish to match. This is more involved but can make the damage disappear.
Remember, practice on scrap is the best way to avoid needing these fixes in the first place!
Frequently Asked Questions (FAQ) about Avoiding Nail Gun Scratches
Q1: What is a “No-Mar Tip” and why is it important?
A no-mar tip is a soft rubber or plastic attachment that fits over the nose of your nail gun. It acts as a protective buffer, preventing the metal parts of the gun from directly contacting and scratching or denting your wood surface.
Q2: How do I adjust the depth on my nail gun?
Most nail guns have a depth adjustment wheel, slider, or dial located near the nose. You’ll typically turn it clockwise to drive nails deeper and counter-clockwise to reduce penetration. Always test on scrap wood after adjusting.
Q3: Can I use softer lumber without worrying about scratches?
Softer lumber is actually more prone to scratches and dents. It’s crucial to use a no-mar tip, keep your depth setting as shallow as possible while still achieving good nail set, and apply consistent, gentle pressure.
Q4: What should I do if my nail gun leaves a deep dent even on the shallowest setting?
If even the shallowest setting is too deep, it might be an issue with your nail gun’s mechanism or air pressure (for pneumatic models). For pneumatic guns, try slightly reducing the air pressure. If it persists, consult your tool manual or consider that specific gun might not be ideal for very delicate work without modifications.
Q5: Is it okay to drag the nail gun’s nose across the wood when moving between shots?
No, absolutely not. You should always lift the nail gun completely off the workpiece when repositioning. Dragging the contact arm, even with a no-mar tip, can cause scuffs and scratches.
Q6: How can I prevent the nail head from sinking too deep and creating a big hole?
This is purely controlled by the depth-of-drive adjustment. Set your nail gun to a shallower depth. Always test on scrap wood first to find the sweet spot where the nail head sits flush or just slightly below the surface without damaging the surrounding wood.
Conclusion: Nail It Right, Every Time
Building and crafting should be rewarding, not frustrating. By implementing these smart, simple techniques – mastering your depth adjustment, using those invaluable no-mar tips, holding your gun steady at a perfect 90-degree angle, choosing the right fasteners, and, of course, practicing on scrap – you’re well on your way to a professional finish. These aren’t complicated secrets; they’re fundamental practices that will save you time, materials, and a whole lot of headaches. So, grab your nailer, keep these tips in mind, and go create something amazing. You’ve got this!