Have you ever wondered why some nailers work better than others? It often comes down to the right air pressure settings. Getting the air pressure just right can make a big difference in your projects. Imagine using a nailer that shoots nails perfectly every time. Wouldn’t that make your work easier?
When you use a nailer, the air pressure affects how well it drives nails. Too low or too high can lead to problems. Did you know that incorrect pressure can even damage your materials? It’s true! That’s why knowing how to adjust air pressure settings is important for any DIY enthusiast or professional.
In this article, we will explore how to find those perfect air pressure settings for nailers. With a few simple tips, you can make your work faster and more enjoyable. Let’s dive in and discover the best ways to use your nailer! You might be surprised at what you learn!
Table of Contents
Essential Air Pressure Settings For Nailers Explained

Understanding Air Pressure Settings for Nailers
Air pressure settings are crucial for using nailers effectively. Too low pressure might cause nails to stick out, while too high can damage materials. Each nailer model has specific recommended settings. Did you know that using the right pressure can make your projects smoother and save time? Fine-tuning your nailer can improve accuracy and help avoid accidents. Knowing how to adjust these settings can really elevate your DIY skills. Why not give it a try next time you’re working on a project?
Understanding Nailers and Their Functionality
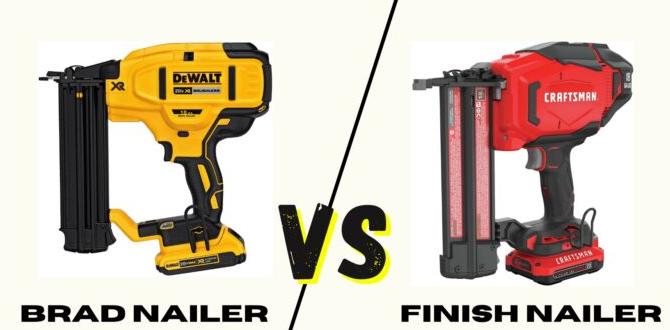
Types of nailers: framing, finish, brad, and upholstery nailers. Importance of correct air pressure settings for performance and safety.
Nailers are essential tools for various projects. There are several types: framing, finish, brad, and upholstery nailers. Each does a different job, from building frames to attaching delicate trim. The right air pressure is like the secret sauce for nailers. Too much pressure? You’ll have a nail explosion. Too little? You get a weak bond that screams for help! Keeping these settings just right ensures your safety and keeps your projects looking sharp.
| Nailer Type | Common Use |
|---|---|
| Framing | Building walls |
| Finish | Trim and molding |
| Brad | Lightweight projects |
| Upholstery | Furniture |
Why Air Pressure Matters for Nailers
Effects of incorrect air pressure on nails: underdriving vs. overdriving. Influence on nail penetration depth and material integrity.
Using the wrong air pressure with nailers can lead to a clumsy mess. If the pressure is too low, nails might not go in all the way—this is called underdriving. On the other hand, too much pressure can cause the nails to sink in too deep, known as overdriving. This can ruin your material by splintering or cracking it. Nail integrity is crucial, and getting it right can save you from expensive mistakes. Let’s break it down in this handy table:
| Type of Pressure | Effect |
|---|---|
| Underdriving | Nails don’t penetrate fully |
| Overdriving | Nails sink too deep, risking damage |
So, for a smooth project, remember: the right air pressure makes all the difference! Nail it, not fail it!
Recommended Air Pressure Settings for Different Nailers
Standard air pressure ranges for framing nailers. Specific settings for finish and brad nailers.
Nailers work better with the right air pressure. It’s like giving them a cup of coffee before a big job! For framing nailers, standard air pressure is usually around 70 to 100 PSI. This helps them drive big nails into wood without fuss. On the other hand, finish and brad nailers prefer a gentler touch, needing about 60 to 80 PSI to make sure they drive nails without damaging the surface. Here’s a quick look:
| Nailer Type | Recommended Air Pressure (PSI) |
|---|---|
| Framing Nailer | 70 – 100 |
| Finish Nailer | 60 – 80 |
| Brad Nailer | 60 – 80 |
Use the right settings, and your nailer will thank you with a job well done! Or maybe it will just keep driving nails like a champ!
Factors Influencing Air Pressure Settings
Material types: softwood vs. hardwood and their impact. Nail size and type: how it affects required air pressure.
Different materials need different air pressures. For example, softwood is easier to nail through than hardwood. This means you often need less pressure for softwood. Nail size and type also matter. Larger nails require more pressure, while smaller nails need less. Using the right settings ensures your nails go in smoothly.
How do material types and nail sizes affect air pressure settings?
Material types and nail sizes significantly influence air pressure settings. Different nails and woods require different settings for good results. Here’s a simple breakdown:
- Softwood: Lower pressure
- Hardwood: Higher pressure
- Small nails: Less pressure
- Large nails: More pressure
How to Adjust Air Pressure on Your Nail Gun
Stepbystep guide for adjusting air pressure on pneumatic nailers. Importance of using a pressure regulator and gauge.
Adjusting the air pressure on your nail gun is simpler than tying your shoelaces. First, make sure your nailer is turned off. Next, locate the pressure regulator, usually near the air inlet. Turn it to change the pressure. Use a pressure gauge to check the setting. Always follow your nail gun’s manual for the correct pressure—using too high can turn a nailer into a “nail sprinkler!”
| Steps | What to Do |
|---|---|
| 1 | Turn off the nail gun. |
| 2 | Find the pressure regulator. |
| 3 | Adjust the pressure and check with the gauge. |
| 4 | Refer to the manual for best settings. |
Using a pressure regulator is important; it keeps your nail gun safe and accurate. Too much pressure can cause misfires or damage, while too little may not drive nails in right. Remember, “A happy nailer equals a happy builder!”
Troubleshooting Common Air Pressure Issues
Identifying symptoms of wrong air pressure settings. Solutions for addressing problems like misfires or jammed nails.
Having the wrong air pressure can cause real problems. You might notice misfires or even jammed nails. When your nailer doesn’t work right, it can be frustrating! Here are some signs to watch for:
- Weak nail penetration
- Nails sticking inside the tool
- Nailer stopping unexpectedly
To fix these issues, try these solutions:
- Check and adjust the air pressure settings.
- Clean the nailer to clear jams.
- Inspect hoses for leaks.
Proper air pressure will keep your nailer running smoothly. Regular checks can save you time and hassle!
What should I check if my nailer is misfiring?
First, check the air pressure settings. Adjust to the recommended pressure for your nails. Also, ensure the nails are loaded correctly in the magazine. A clean nailer can help too!
Safety Precautions When Operating Nailers
Recommended protective gear and safety measures. Best practices to prevent accidents related to air pressure settings.
Using nailers can be a blast, but safety first! Always wear protective gear like safety glasses and ear protection. Trust me, you don’t want a rogue nail turning into an unwanted piercing! Keep your fingers away from the nail path and won’t try to catch any flying nails; they’re better off in the wall. Test air pressure settings on scrap wood before the real deal to avoid surprises. Remember, better safe than sorry!
| Protective Gear | Purpose |
|---|---|
| Safety Glasses | Protects eyes from debris |
| Ear Protection | Reduces noise from nailers |
Maintenance Tips for Nailers
Importance of regular checks on air pressure and equipment. Cleaning and servicing tips to maintain optimal performance.
Keeping your nailers in top shape is like feeding a pet; if you ignore them, they go wild! Regularly check the air pressure to ensure the tools don’t turn into mischief-makers. A quick cleaning after each use can save you from big headaches later on. Use a soft cloth to wipe off dust and grease. Don’t forget to examine the o-rings: they can be sneakily bad when you least expect it!
| Maintenance Tips | Frequency |
|---|---|
| Check air pressure | Before each use |
| Clean the exterior | After every session |
| Inspect o-rings | Monthly |
Stay ahead of problems and your nailer will thank you with smooth, precise work. It’s like having a loyal friend who keeps you out of trouble!
Conclusion
In summary, air pressure settings for nailers are crucial for safe and effective use. Always check the manufacturer’s guide for correct settings. Adjust the pressure for different materials to avoid damage. Take time to practice and get familiar with your nailer. For more tips and tricks, consider reading more articles or watching tutorials. Happy nailing!
FAQs
What Is The Recommended Air Pressure Setting For Different Types Of Nailers, Such As Finish Nailers, Brad Nailers, And Roofing Nailers?
For finish nailers, you should set the air pressure to about 70 to 90 PSI (pounds per square inch). For brad nailers, the pressure can be lower, around 60 to 80 PSI. For roofing nailers, use a higher pressure, roughly 90 to 110 PSI. It’s important to check your nailer’s manual to be sure. Always start with a lower setting and adjust if needed!
How Can Incorrect Air Pressure Settings Affect The Performance And Lifespan Of A Nail Gun?
If you set the air pressure wrong on a nail gun, it can cause problems. Too low pressure makes it hard to drive nails in. Too high pressure can break the nail gun or cause it to misfire. This can make the nail gun wear out faster. Keeping the right pressure helps it work better and last longer.
What Are The Signs That Indicate An Air Pressure Setting Adjustment Is Needed For Optimal Nailer Performance?
If your nailer is not working well, you might need to change the air pressure. Look out for problems like nails not going in all the way or sticking out. If nails are going too deep or you hear a strange sound, that’s a sign too. You may also see jams happening often. Adjust the pressure until everything runs smoothly!
How Do Environmental Factors, Like Temperature And Altitude, Influence The Air Pressure Settings For Nailers?
Environmental factors like temperature and altitude can change how nailers work. When it’s hot, the air gets lighter, so we need less pressure. At higher altitudes, there’s less air, which also means we should lower the pressure. If it’s cold, we might need more pressure to make the nailer work well. Adjusting pressure helps us get the job done right!
Are There Any Specific Considerations For Adjusting Air Pressure Settings When Using Different Thicknesses Of Materials With A Nailer?
Yes, you need to change the air pressure when using a nailer with different material thicknesses. Thicker materials need higher pressure for the nail to go in well. Thinner materials need lower pressure, so you don’t damage them. Always check your nailer’s instructions for the best settings. This way, your projects will look great and stay strong!