Quick Summary
An air powered nail gun with a quick release nose is your best friend for fast, frustration-free nailing. It lets you clear jams easily, saving time and effort on any woodworking project. This guide shows you how to use and maintain yours like a pro.
Hey there, fellow DIYers and woodworkers! Jack Shaffer here from Nailerguy. Ever been in the middle of a project, feeling that woodworking mojo, only to have your nail gun jam? It’s just the worst, right? That fiddly, frustrating process of trying to unstick a stubborn nail can really put a damper on things. But what if I told you there’s a simple feature that can make clearing nail jams a breeze? That’s where the amazing quick release nose on many air powered nail guns comes in. Let’s dive into how this handy feature works and why it’s a game-changer for your projects.
This guide is all about making your life easier. We’ll cover what this special nose is, why it’s so useful, and how to use it safely and effectively. Plus, we’ll touch on some basic maintenance to keep your nail gun running smoothly. Get ready to say goodbye to nail jam headaches!
Table of Contents
What Exactly is a Quick Release Nose on an Air Nailer?
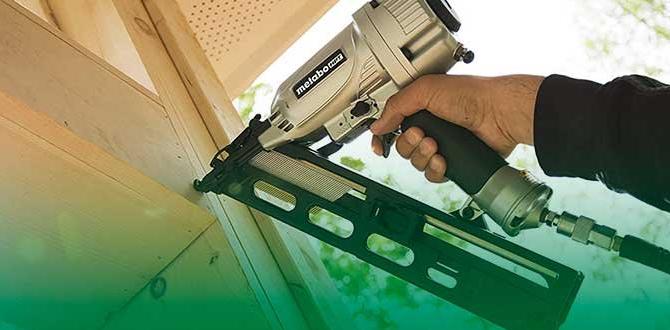
Think of the nose of your nail gun as the part that touches the wood and guides the nail. On most air powered nail guns, this nose is where the nail is fired from. A “quick release nose” is a specific design feature that makes it super easy to open up this front part of the nailer without needing special tools.
Typically, it involves a lever or a simple latch mechanism. When you flip or slide this mechanism, the front cover or “nose” pops open. This gives you clear access to the nail magazine where the nails are stored and where jams usually happen. It’s designed for speed and convenience, letting you get back to work in no time.
Why is a Quick Release Nose a Big Deal?
You might be thinking, “Can’t I just fix a jam without this special nose?” Well, yes, you can, but it’s often a lot more difficult and time-consuming. Here’s why the quick release nose is such a valuable feature:
- Speed: This is the biggest benefit. Clearing a jam usually takes seconds instead of minutes because you have direct access.
- Ease of Use: No need to hunt for screwdrivers or special tools. It’s designed to be opened with your hand.
- Reduced Frustration: Less time spent fussing with jams means more time enjoying your project.
- Improved Safety: By making it easy to visually inspect and clear jams, you’re less likely to have to force things, which can be dangerous.
- Accessibility: It allows you to easily see if there are any obstructions and remove bent or misfired nails with minimal fuss.
For anyone who uses a nail gun regularly, whether for DIY home repairs, building furniture, or larger construction projects, this feature can dramatically improve your workflow and overall experience.
How to Use Your Air Powered Nail Gun With a Quick Release Nose
Using your air powered nail gun is pretty straightforward, but understanding the quick release nose is key to efficient operation. Here’s a step-by-step guide to using it, especially when dealing with a jam.
Step 1: Safety First! Always Disconnect the Air Supply
This is the MOST important step, no matter what. Before you do anything, disconnect the air hose from your nailer. This ensures the gun cannot accidentally fire while you’re working on it, preventing serious injury. You can do this by simply pulling the quick-connect fitting off the air inlet on your nail gun.
Always double-check that there’s no air pressure in the tool. Some tools have a small trigger lock, which is also a good idea to engage.
Step 2: Identify the Jam
A jam typically occurs when a nail doesn’t feed correctly into the chamber or gets bent. You might notice the nailer struggling to drive a nail, or you might hear a different sound during operation. Often, the last nail fired will be partially sticking out, or a bent nail will be visible.
Step 3: Engage the Quick Release Nose Mechanism
Locate the lever or button that operates the quick release nose. This is usually found on the front of the nail gun, near where the nails are fired. It might be a small tab you pull up or sideways, or a button you press. Refer to your nail gun’s manual if you’re unsure. Gently operate the mechanism to open the nose.
You’ll typically see the magazine cover swing open, giving you a clear view inside. For example, some Paslode nailers have a nose that pivots open, while others might have a sliding component.
Step 4: Clear the Jammed Nail
Once the nose is open, you’ll have direct access to the nail track and magazine. Look for the offending nail. It might be bent, broken, or simply not aligned correctly. Use a pair of pliers or even the tip of another nail to gently extract the jammed nail. Be careful not to force anything, as this could damage the internal mechanisms of your nail gun.
You should be able to see the entire path the nail takes. If a nail is only partially driven, you might need to carefully pull it out. If a nail is broken, you might need to remove both pieces.
Step 5: Inspect and Reassemble
After removing the jammed nail, take a moment to inspect the nail track and magazine. Make sure there are no small fragments of nails or any other debris. Give it a quick wipe if needed. Once you’re confident it’s clear, close the quick release nose. Most models will have a satisfying click when they are securely shut. Ensure it’s fully closed to prevent any issues with nail feeding.
Step 6: Reconnect Air and Test
Now that the jam is cleared and the gun is reassembled, reconnect the air hose. You can test the nail gun by firing a few nails into a piece of scrap wood to ensure it’s working properly.
If you’re still experiencing issues, double-check the air pressure settings on your compressor and the depth adjustment on the nail gun, as these can sometimes affect performance. For more complex issues, consulting your tool’s manual or a professional is always a good idea.
Choosing the Right Air Powered Nail Gun With Quick Release Nose
When you’re in the market for a new air powered nail gun, the quick release nose is a feature worth looking for. But there are other things to consider too:
Nailer Types and Their Common Uses
Air powered nail guns come in various types, each designed for specific tasks. Most nailers with quick release noses are for common woodworking and construction tasks.
| Nailer Type | Common Uses | Nail Size/Type |
|---|---|---|
| Framing Nailer | Structural framing, decks, subflooring | Large nails (2″ to 3.5″) |
| Finish Nailer | Trim, molding, baseboards, crown molding | Medium nails (1.5″ to 2.5″) |
| Brad Nailer | Picture frames, delicate trim, small repairs | Small, thin nails (0.5″ to 1.5″) |
| Angled Nailer | Hard-to-reach places, corners, joists | Similar to framing or finish nails, but angled head |
Most beginner-friendly DIY projects will likely benefit from a finish nailer or a brad nailer, both of which frequently come with a quick release nose. Framing nailers, while powerful, are usually for heavier-duty construction.
Key Features to Look For
- Quick Release Nose: As we’ve discussed, this is a must-have for easy jam clearing.
- Adjustable Depth Control: Lets you set how deep the nail drives into the wood. Essential for different wood types and finishes.
- Adjustable Exhaust Port: Directs air away from your face and your work area.
- No-Mar Tip: A soft rubber tip on the nose to prevent marring delicate surfaces.
- Magazine Capacity: How many nails the gun can hold at once.
- Ergonomics/Weight: A comfortable grip and manageable weight are crucial for long work sessions.
- Nail Range: Ensure it accepts the types and lengths of nails you’ll need for your projects.
Air Requirements
Air powered nail guns require an air compressor. You’ll need to ensure your compressor meets the nail gun’s needs:
- PSI (Pounds per Square Inch): This is the operating pressure. Most nailers work between 70-120 PSI. Check your nail gun’s specifications.
- CFM (Cubic Feet per Minute): This is the volume of air the compressor can deliver. You need a compressor that can supply enough CFM to keep up with your nailer’s usage. A good rule of thumb is to have a compressor with a CFM rating at least 1.5 times the nailer’s requirement. Visit sources like Engineering Toolbox for CFM calculations.
A small pancake compressor is often sufficient for finish and brad nailers used in DIY settings. For framing nailers or continuous use, you’ll need a larger, more robust compressor.
Maintenance Tips for Your Air Powered Nail Gun
Keeping your air powered nail gun in good shape will ensure it performs reliably for years. The quick release nose, making access easier, also simplifies maintenance.
Daily/Before Each Use Checks
- Inspect the Nose: Look for any damage or debris.
- Check the Magazine: Ensure it’s clean and that the driver blade moves freely.
- Check Air Connections: Make sure the hose and fittings are secure and not leaking.
- Lubricate (If Required): Some nail guns require a drop of specialized oil in the air inlet daily. Check your manual. Many modern tools are oil-free.
Weekly/Monthly Maintenance
- Clean the Exterior: Wipe down the tool with a damp cloth to remove dust and debris.
- Clean the Magazine Interior: Open the quick release nose and use a soft brush or cloth to remove any sawdust or nail fragments from the magazine track.
- Inspect Seals and O-rings: Look for any signs of wear or damage.
- Check Driver Blade: Ensure it’s straight and not damaged.
Annual Maintenance (or as needed)
- Deep Cleaning: Some nail guns may benefit from a more thorough internal cleaning as recommended by the manufacturer. This might involve disassembling certain parts.
- Professional Servicing: If your tool is used heavily, consider having it serviced by a professional tool repair service annually.
Proper maintenance not only prevents jams but also extends the life of your nail gun. For more detailed maintenance, always refer to the manufacturer’s instructions provided with your specific nailer. Maintaining your tool is crucial for safety and longevity, much like adhering to safety guidelines from organizations like the Occupational Safety and Health Administration (OSHA) for power tool usage.
Troubleshooting Common Nail Gun Issues
Even with a quick release nose, you might encounter the occasional hiccup. Here are some common problems and how to address them.
Problem: Nail Gun Won’t Fire
Possible Causes:
- No air pressure in the compressor.
- Air hose not connected or leaking connection.
- Safety contact tip (the part that touches the wood) is not depressed.
- Internal jam (even with quick release, a hidden jam can occur).
- Low air pressure setting.
Solutions:
- Check compressor and air supply.
- Ensure hose is securely connected.
- Press the tip firmly against your work surface.
- Disconnect air and open the quick release nose to check for jams.
- Increase air pressure to the recommended setting.
Problem: Nails Not Driving Deep Enough
Possible Causes:
- Low air pressure.
- Depth adjustment set too high (nail depth too shallow).
- Driving into very hard wood.
- Nail gun needs lubrication (if applicable).
Solutions:
- Increase air pressure.
- Adjust the depth control setting on the nail gun.
- Use a nailer designed for harder woods or pre-drill.
- Lubricate the tool following manufacturer instructions.
Problem: Nails Flipping Up or Bending
Possible Causes:
- Incorrect nail size or type loaded.
- Damaged or bent driver blade inside the gun.
- Nail gun not held flat against the surface when firing.
- Jammed nail remnants in the track.
Solutions:
- Ensure you are using the correct, straight nails for your specific nail gun model.
- Inspect the driver blade with the quick release nose open; replace if damaged.
- Hold the gun firmly and flat against the wood surface.
- Thoroughly clear any jams using the quick release nose.
Problem: Air Leaking From the Nail Gun
Possible Causes:
- Loose air hose connection.
- Damaged O-rings or seals within the nail gun.
- The trigger valve may be worn.
- The quick release nose isn’t closed properly.
Solutions:
- Check and tighten the air hose connection.
- Inspect internal seals and O-rings (may require servicing).
- This often requires professional repair.
- Ensure the quick release nose is fully and securely closed.
Frequently Asked Questions (FAQ) About Air Powered Nail Guns with Quick Release Nose
Q1: Do all air powered nail guns have a quick release nose?
A1: No, not all air powered nail guns come with this feature. It’s a design element often found on mid-range to higher-quality models, especially finish and brad nailers. It’s a feature worth seeking out when purchasing a new tool.
Q2: How often should I lubricate my air powered nail gun?
A2: This depends on the model. Many modern nail guns are “oil-free” and require no regular lubrication. Others might require a single drop of specialized pneumatic tool oil in the air inlet before each use. Always check your tool’s manual for specific instructions.
Q3: Can I use any brand of nails in my nail gun?
A3: It’s best to use nails specifically designed for your nail gun model and type. Using the wrong size or type of nail can lead to jams, damage the tool, and compromise the integrity of your work. Check your manual for recommended nail specifications.
Q4: What’s the difference between an air powered nail gun and a cordless nail gun?
A4: Air powered nail guns use compressed air from an air compressor via a hose. Cordless nail guns have their own power source, usually a battery, and sometimes a small gas canister. Air nailers are generally lighter and offer consistent power, while cordless ones offer portability without a hose.
Q5: How do I know if my air compressor is strong enough for my nail gun?
A5: You need to match the nail gun’s PSI (pressure) and CFM (air volume) requirements with your air compressor’s output. The nail gun’s specifications will list these, and your compressor’s manual or label will list its output. Ensure the compressor’s CFM rating is at least 1.5 times the nailer’s required CFM.
Q6: Is it safe to use a nail gun with a quick release nose if it’s slightly damaged?
A6: It’s generally not recommended to use any power tool that has been damaged. A compromised quick release nose could lead to improper sealing, causing air leaks or more frequent jams. It’s best to get it repaired or replaced before use.
Conclusion
An air powered nail gun with a quick release nose is a smart investment for any DIYer or woodworker. It tackles one of the most common frustrations – nail jams – head-on, transforming a potential headache into a quick fix. By understanding how this feature works, prioritizing safety, and performing basic maintenance, you can ensure smooth,